Back to Brick: Preparing for New Windows
To prepare for the arrival of our new Viking triple glazed windows, we took the openings back to brick. This was hard, messy work. But it paid off as we discovered some horrors that needed fixing.
Why back to brick?
Three reasons:
- Make sure the window openings are in good condition (they weren’t).
- Allow for airight-tape between the window frame and the brick wall.
- Allow for insulated plasterboard in the reveals after install.
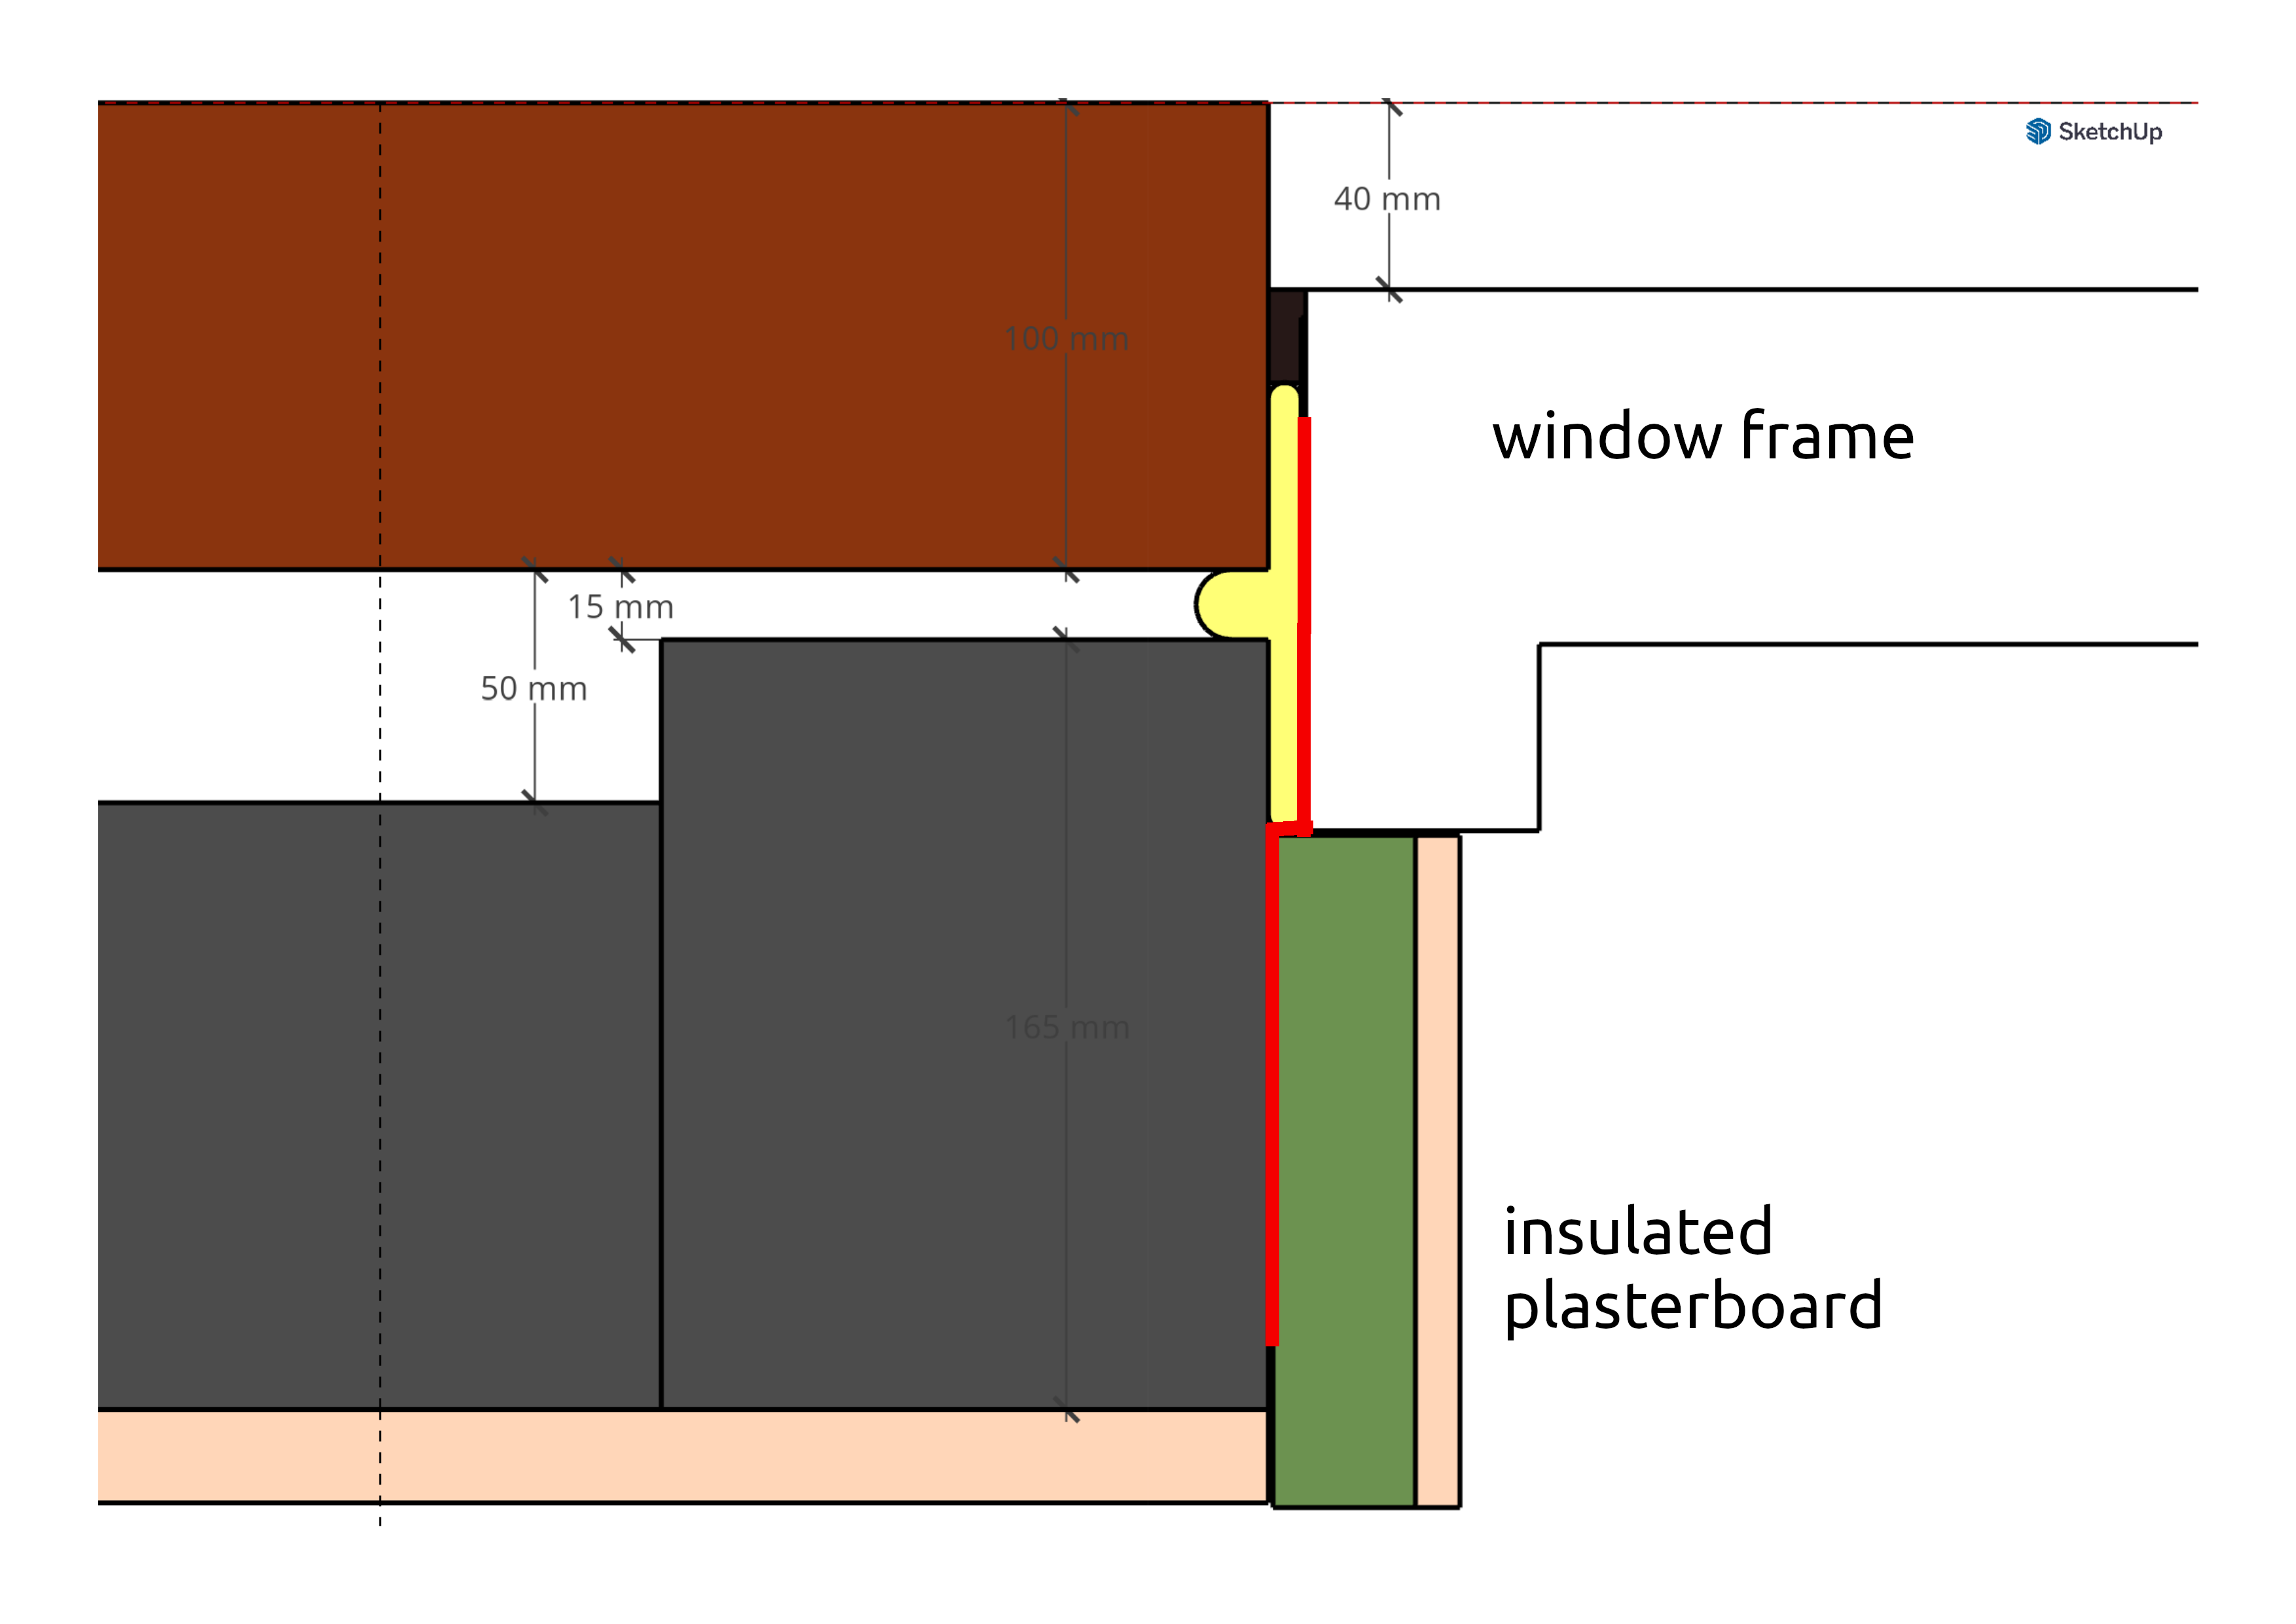
2. and 3. were new to me when I started out. I’d never seen airtightness tape or heard of insulating window reveals.
Installation method is critical
When you’re going for high performance windows, the installation method and workmanship is essential.
The method is very different from how bog standard uPVC windows are installed (screw them in, spray foam round the side, cover with silicone and plastic trim). More on uPVC at the end.
To achieve all-round high performance, as well as the windows themselves, you need to completely eliminate draughts and minimise thermal bridging.
That’s where airtightness tape and insulated reveals comes in.
Here’s a rough sketch of the build-up with the airtightness tape shown in red:
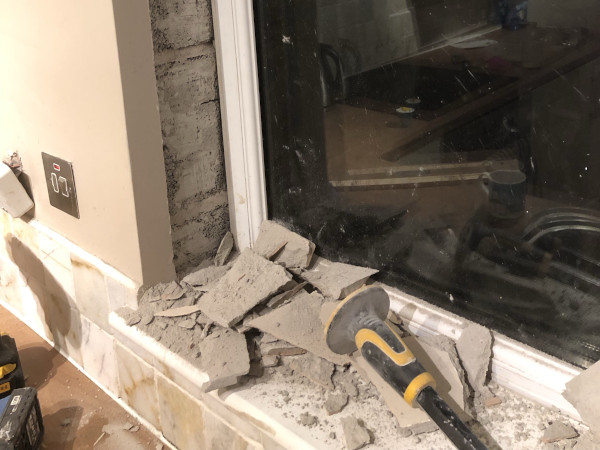
Checking the openings
The window frames need a good brick edge to sit against. This is non-negotiable for any windows but especially for high performance where you’re aiming for air-tightness around the edge of the window.
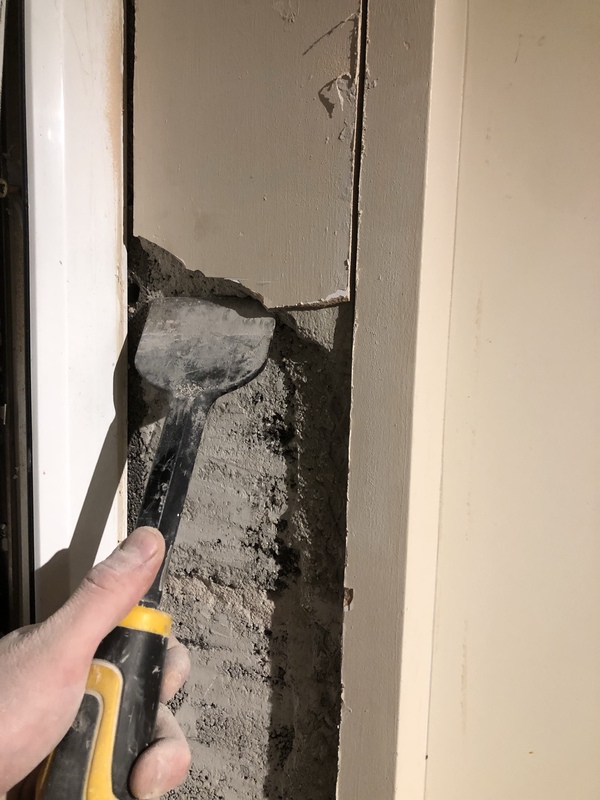
I used a multitool “wiggle saw” to cut a line through 20mm of plaster to the breeze block, then a cold chisel and mallet to break the plaster off the wall.
That got old quick and I borrowed a powerful SDS hammer drill with a chisel attachment. That sped things up!
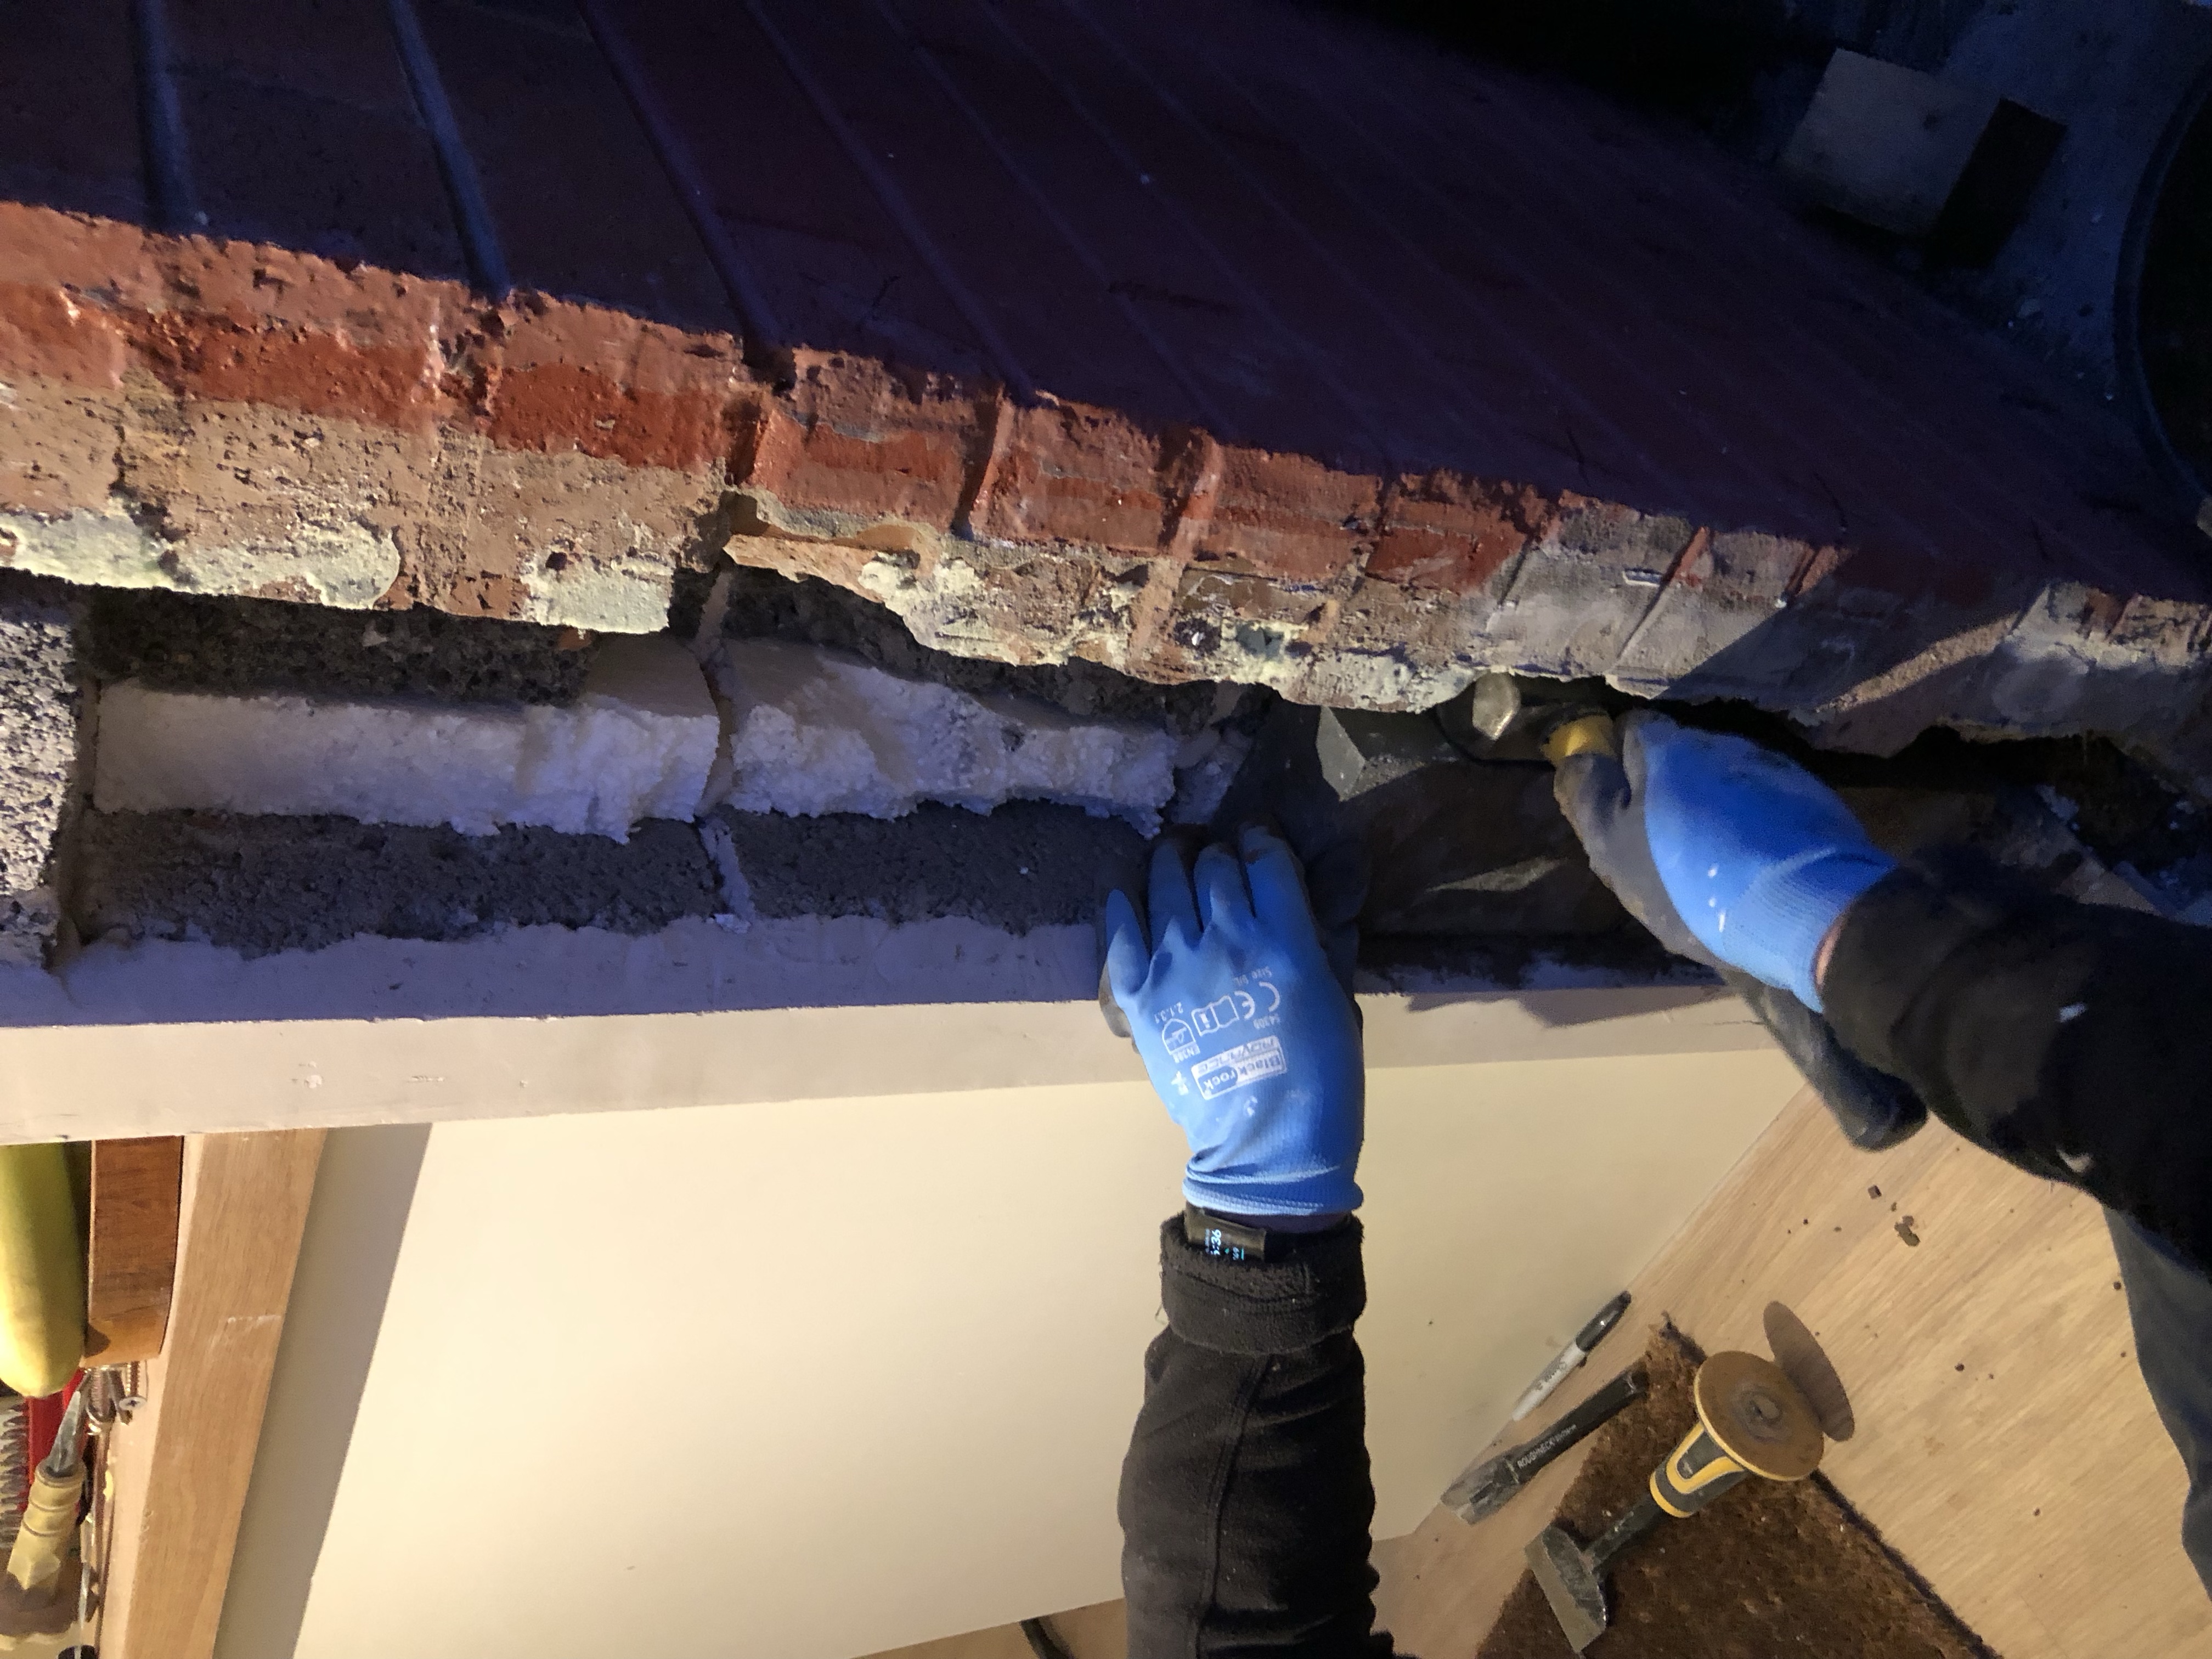
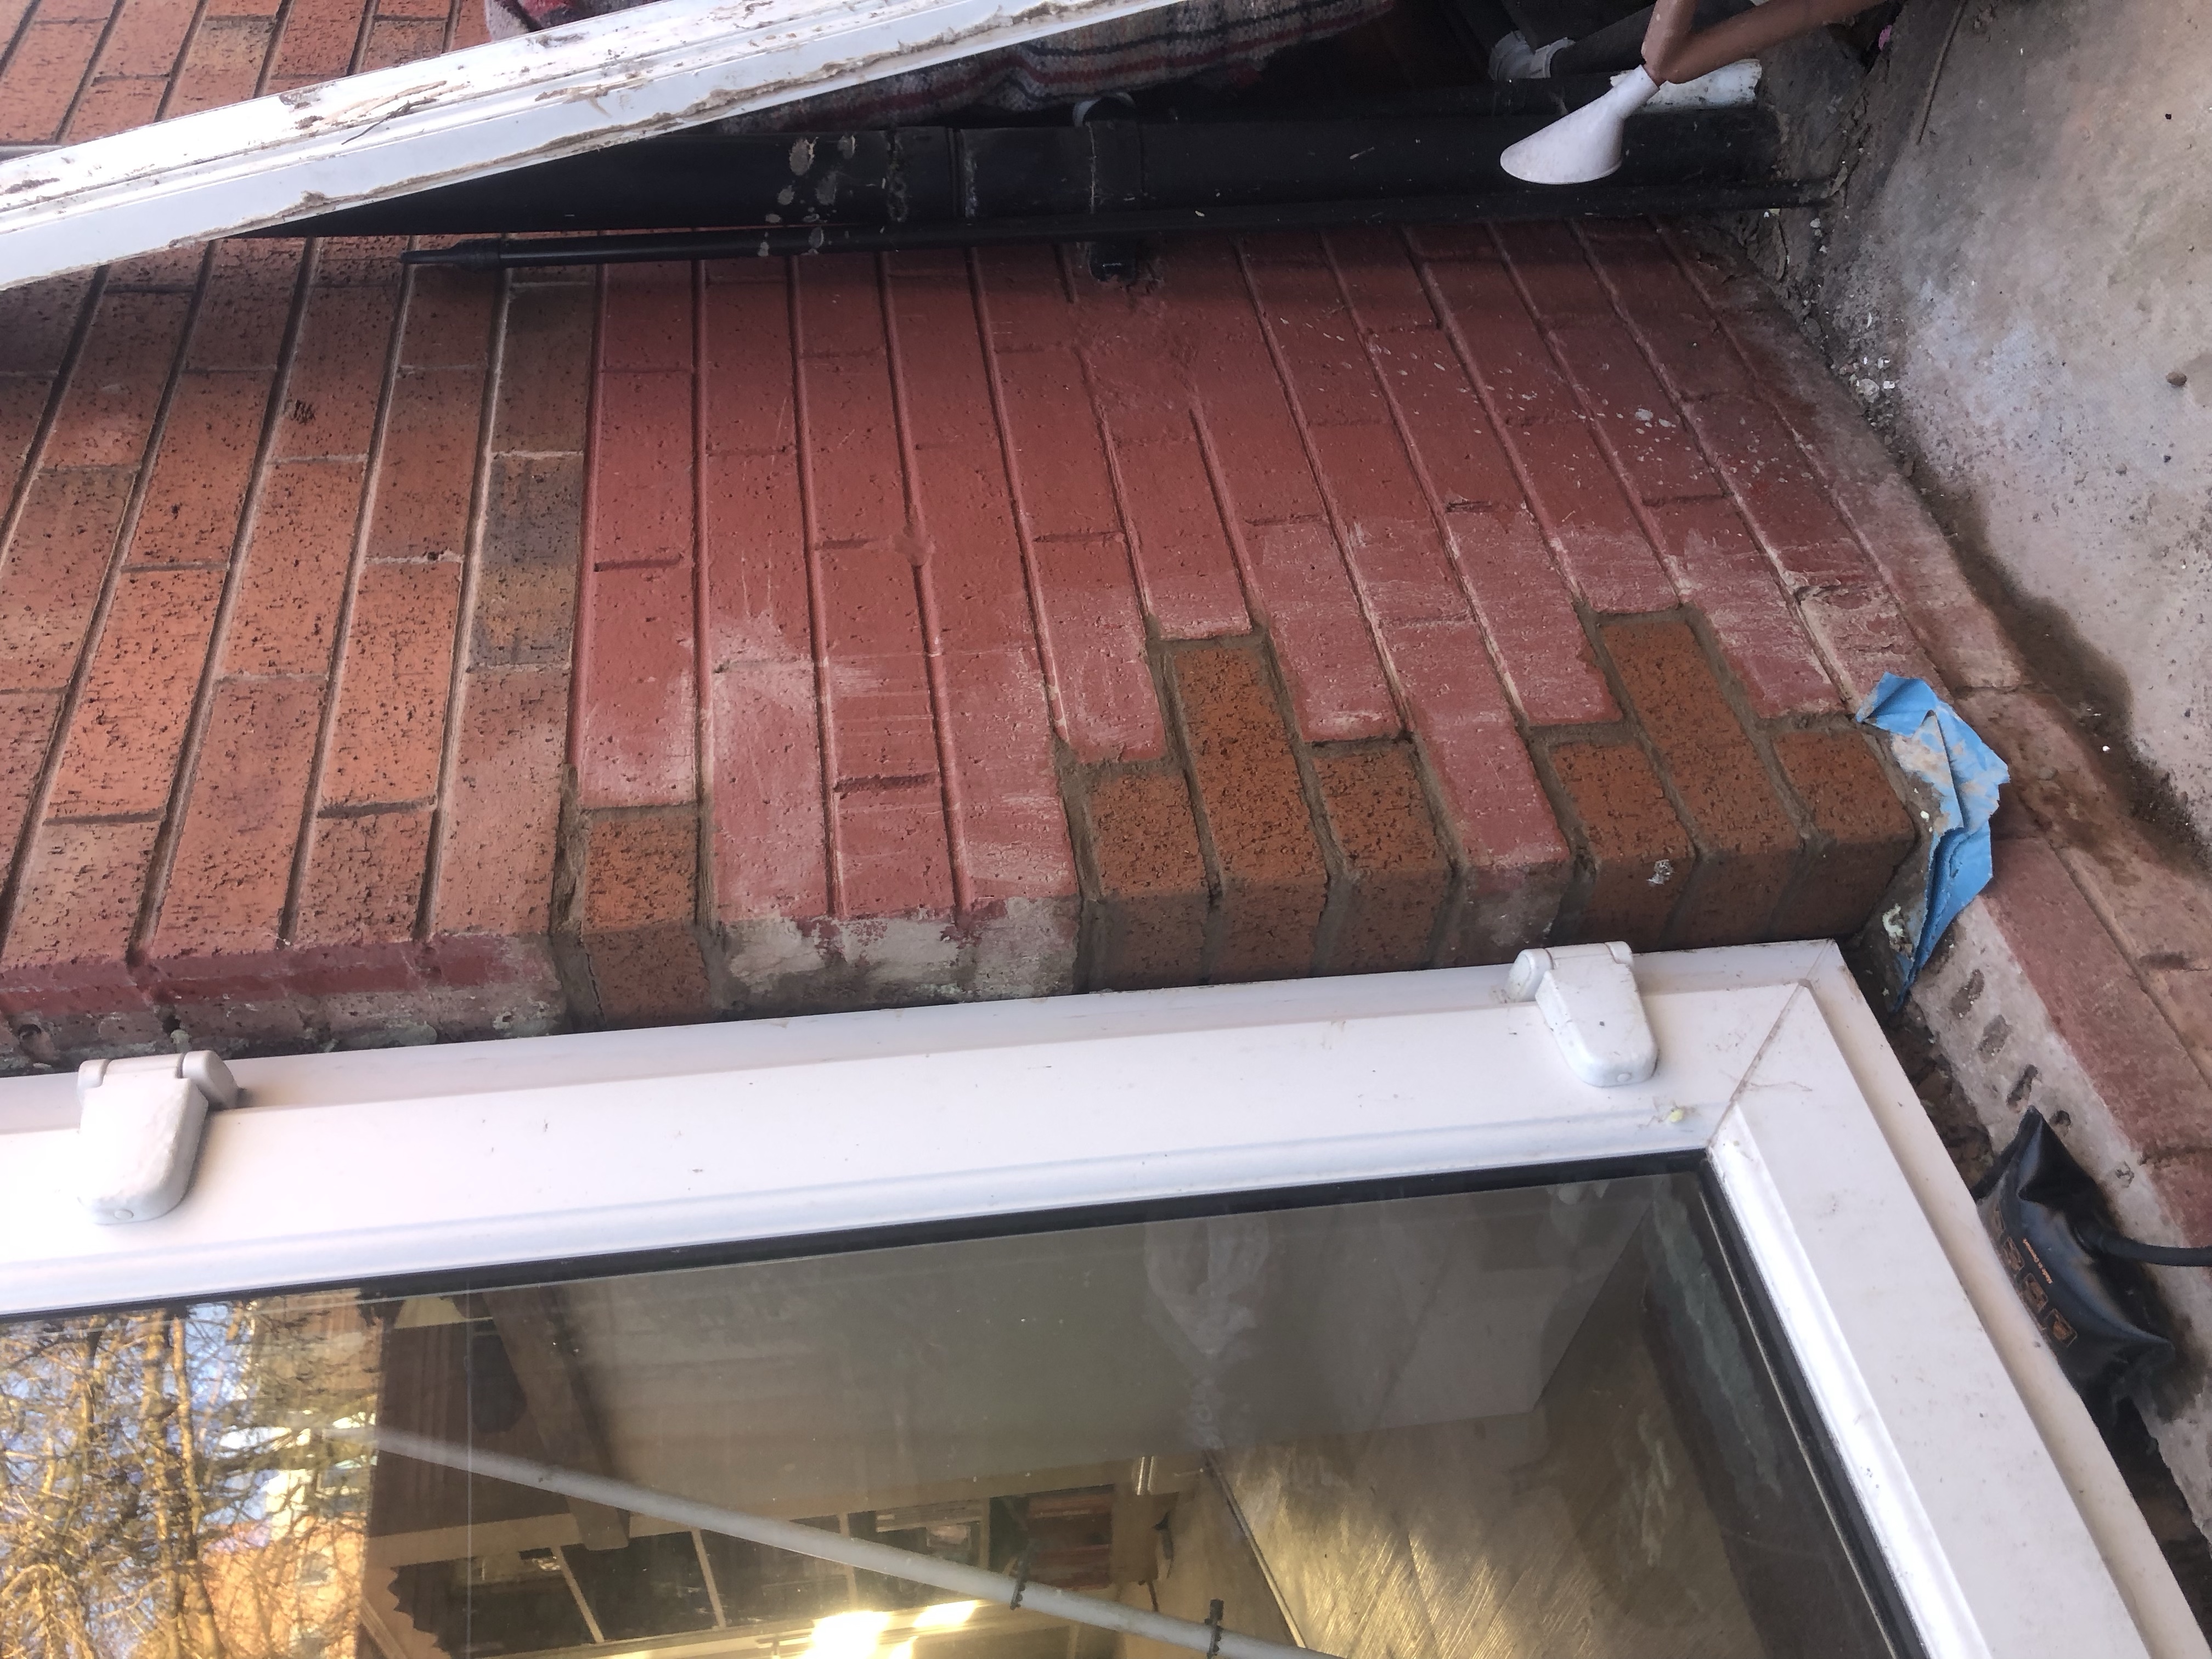
French doors: bricks missing
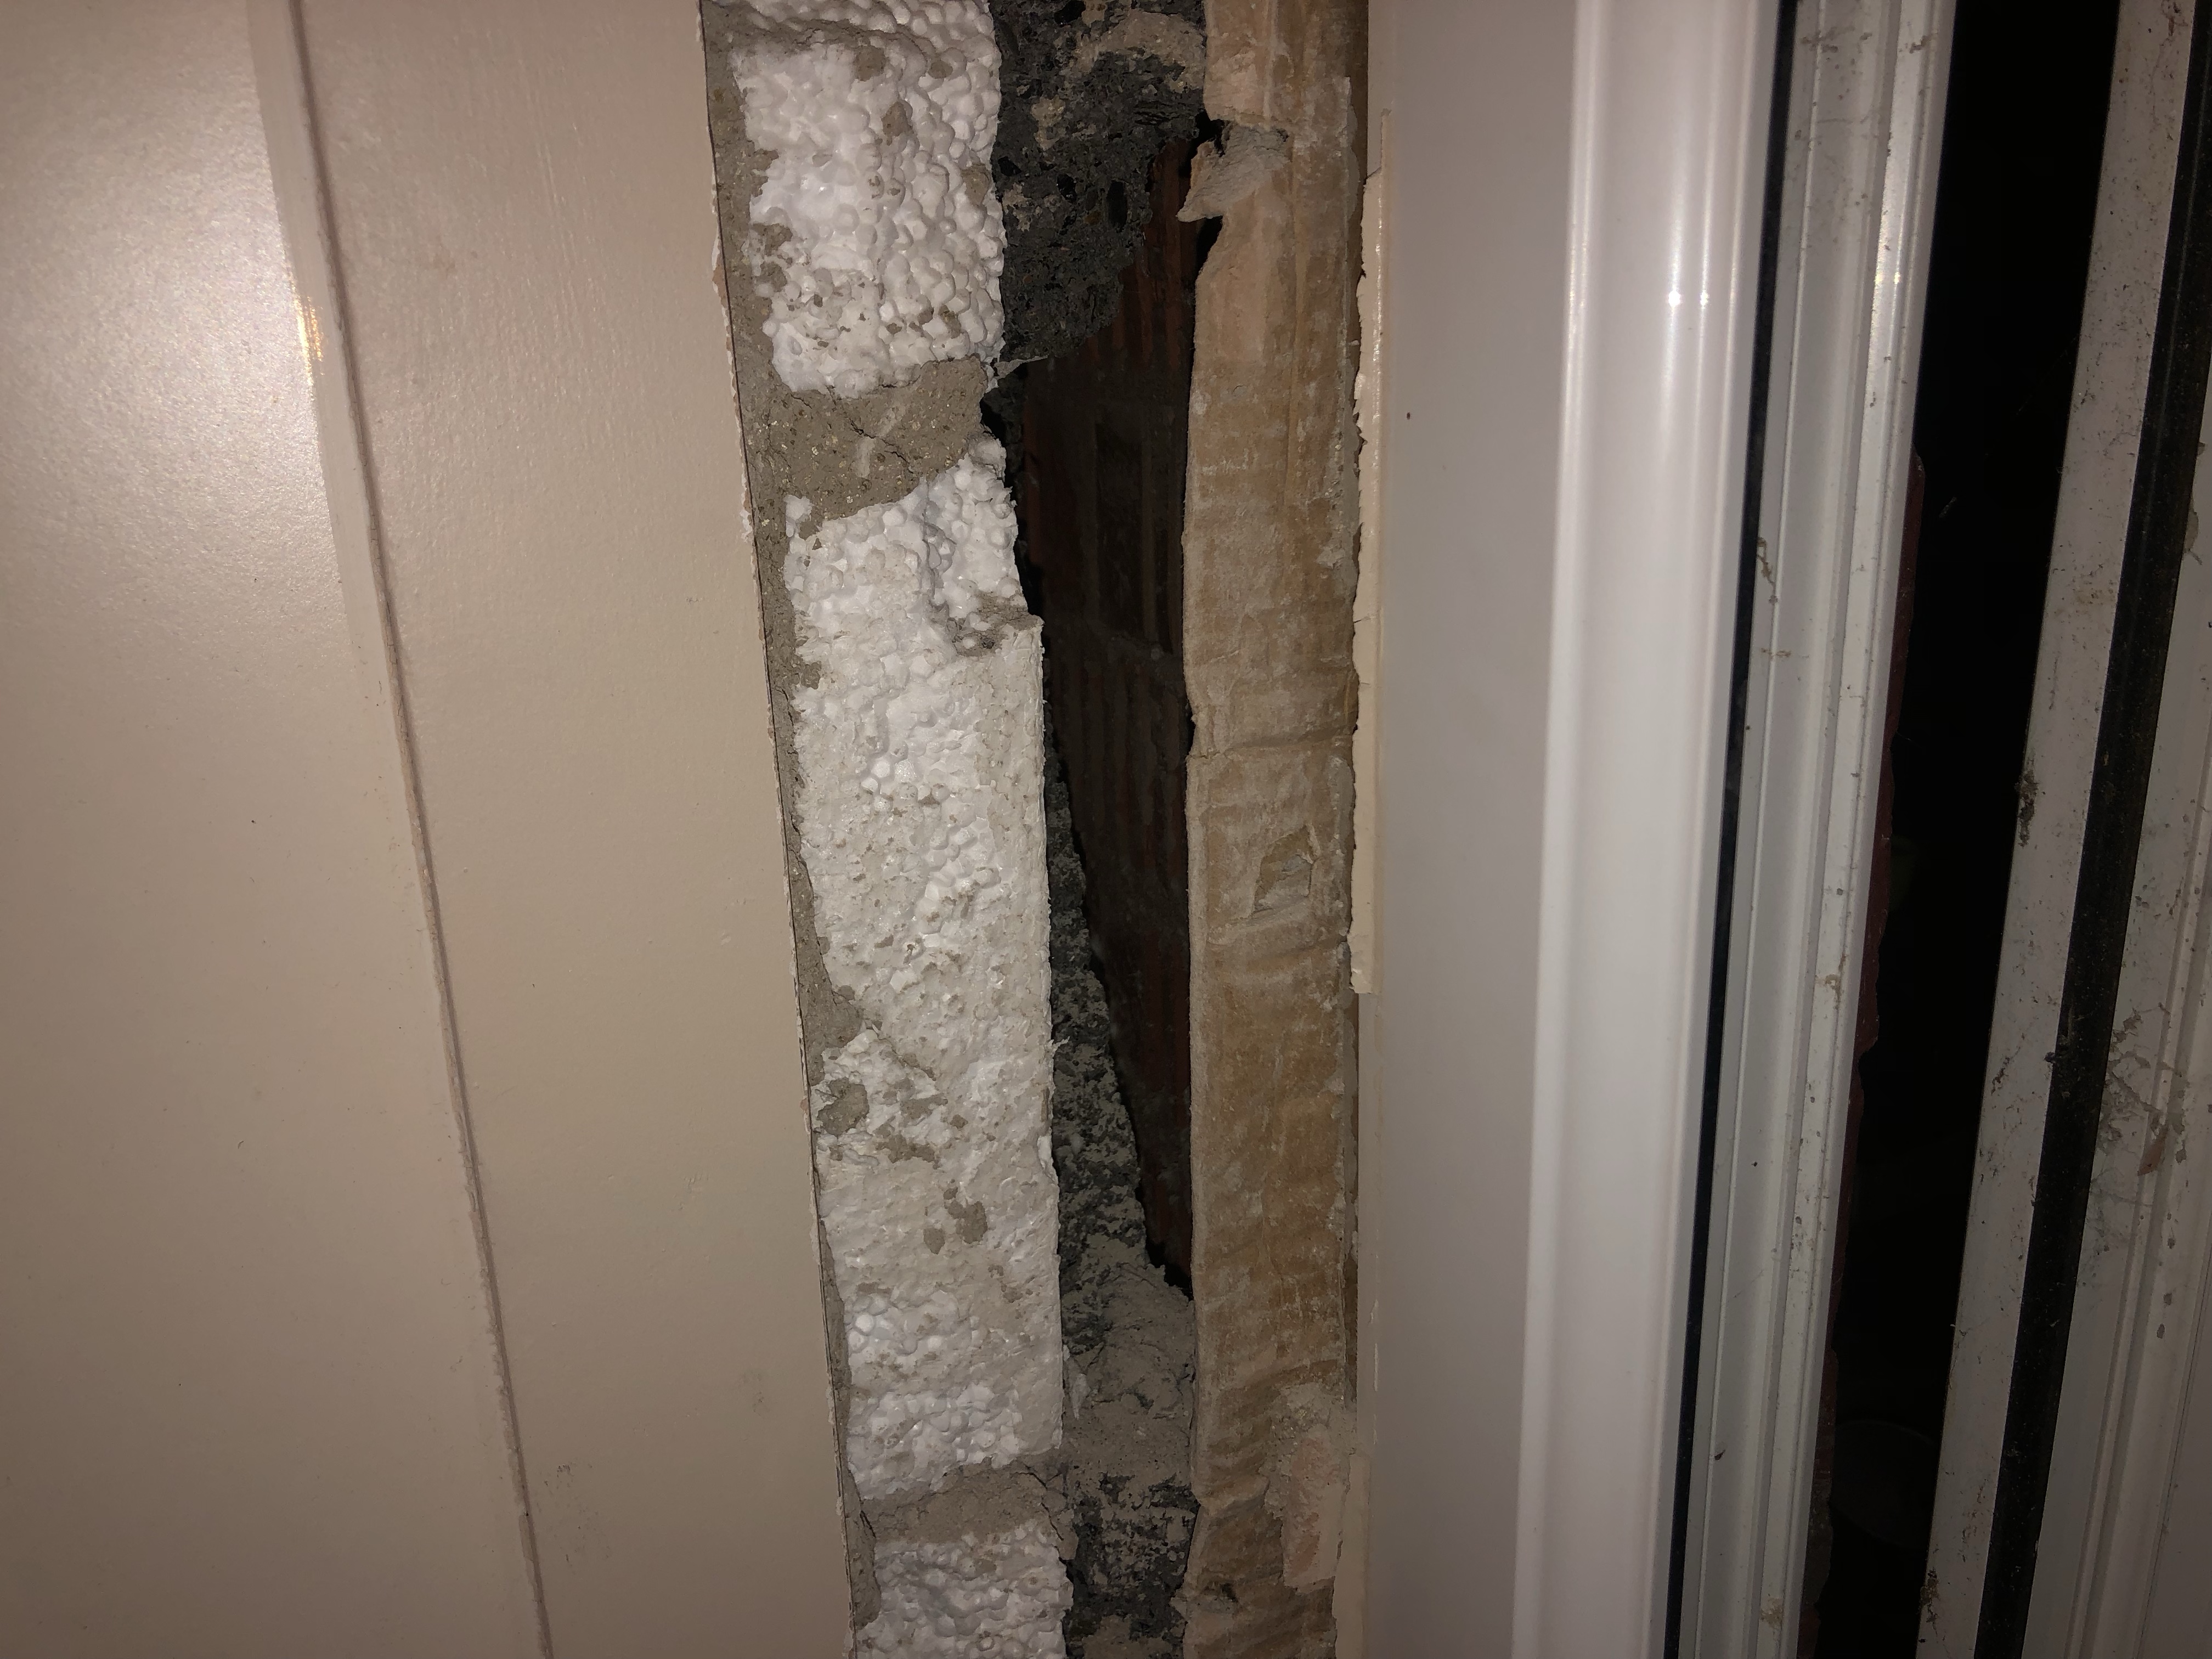
The first surprise was the kitchen French doors. As I was cutting down the plaster and was bemused when my multitool disappeared into thin air…
To my amazement, there were bricks missing, replaced by cardboard and expanding foam.
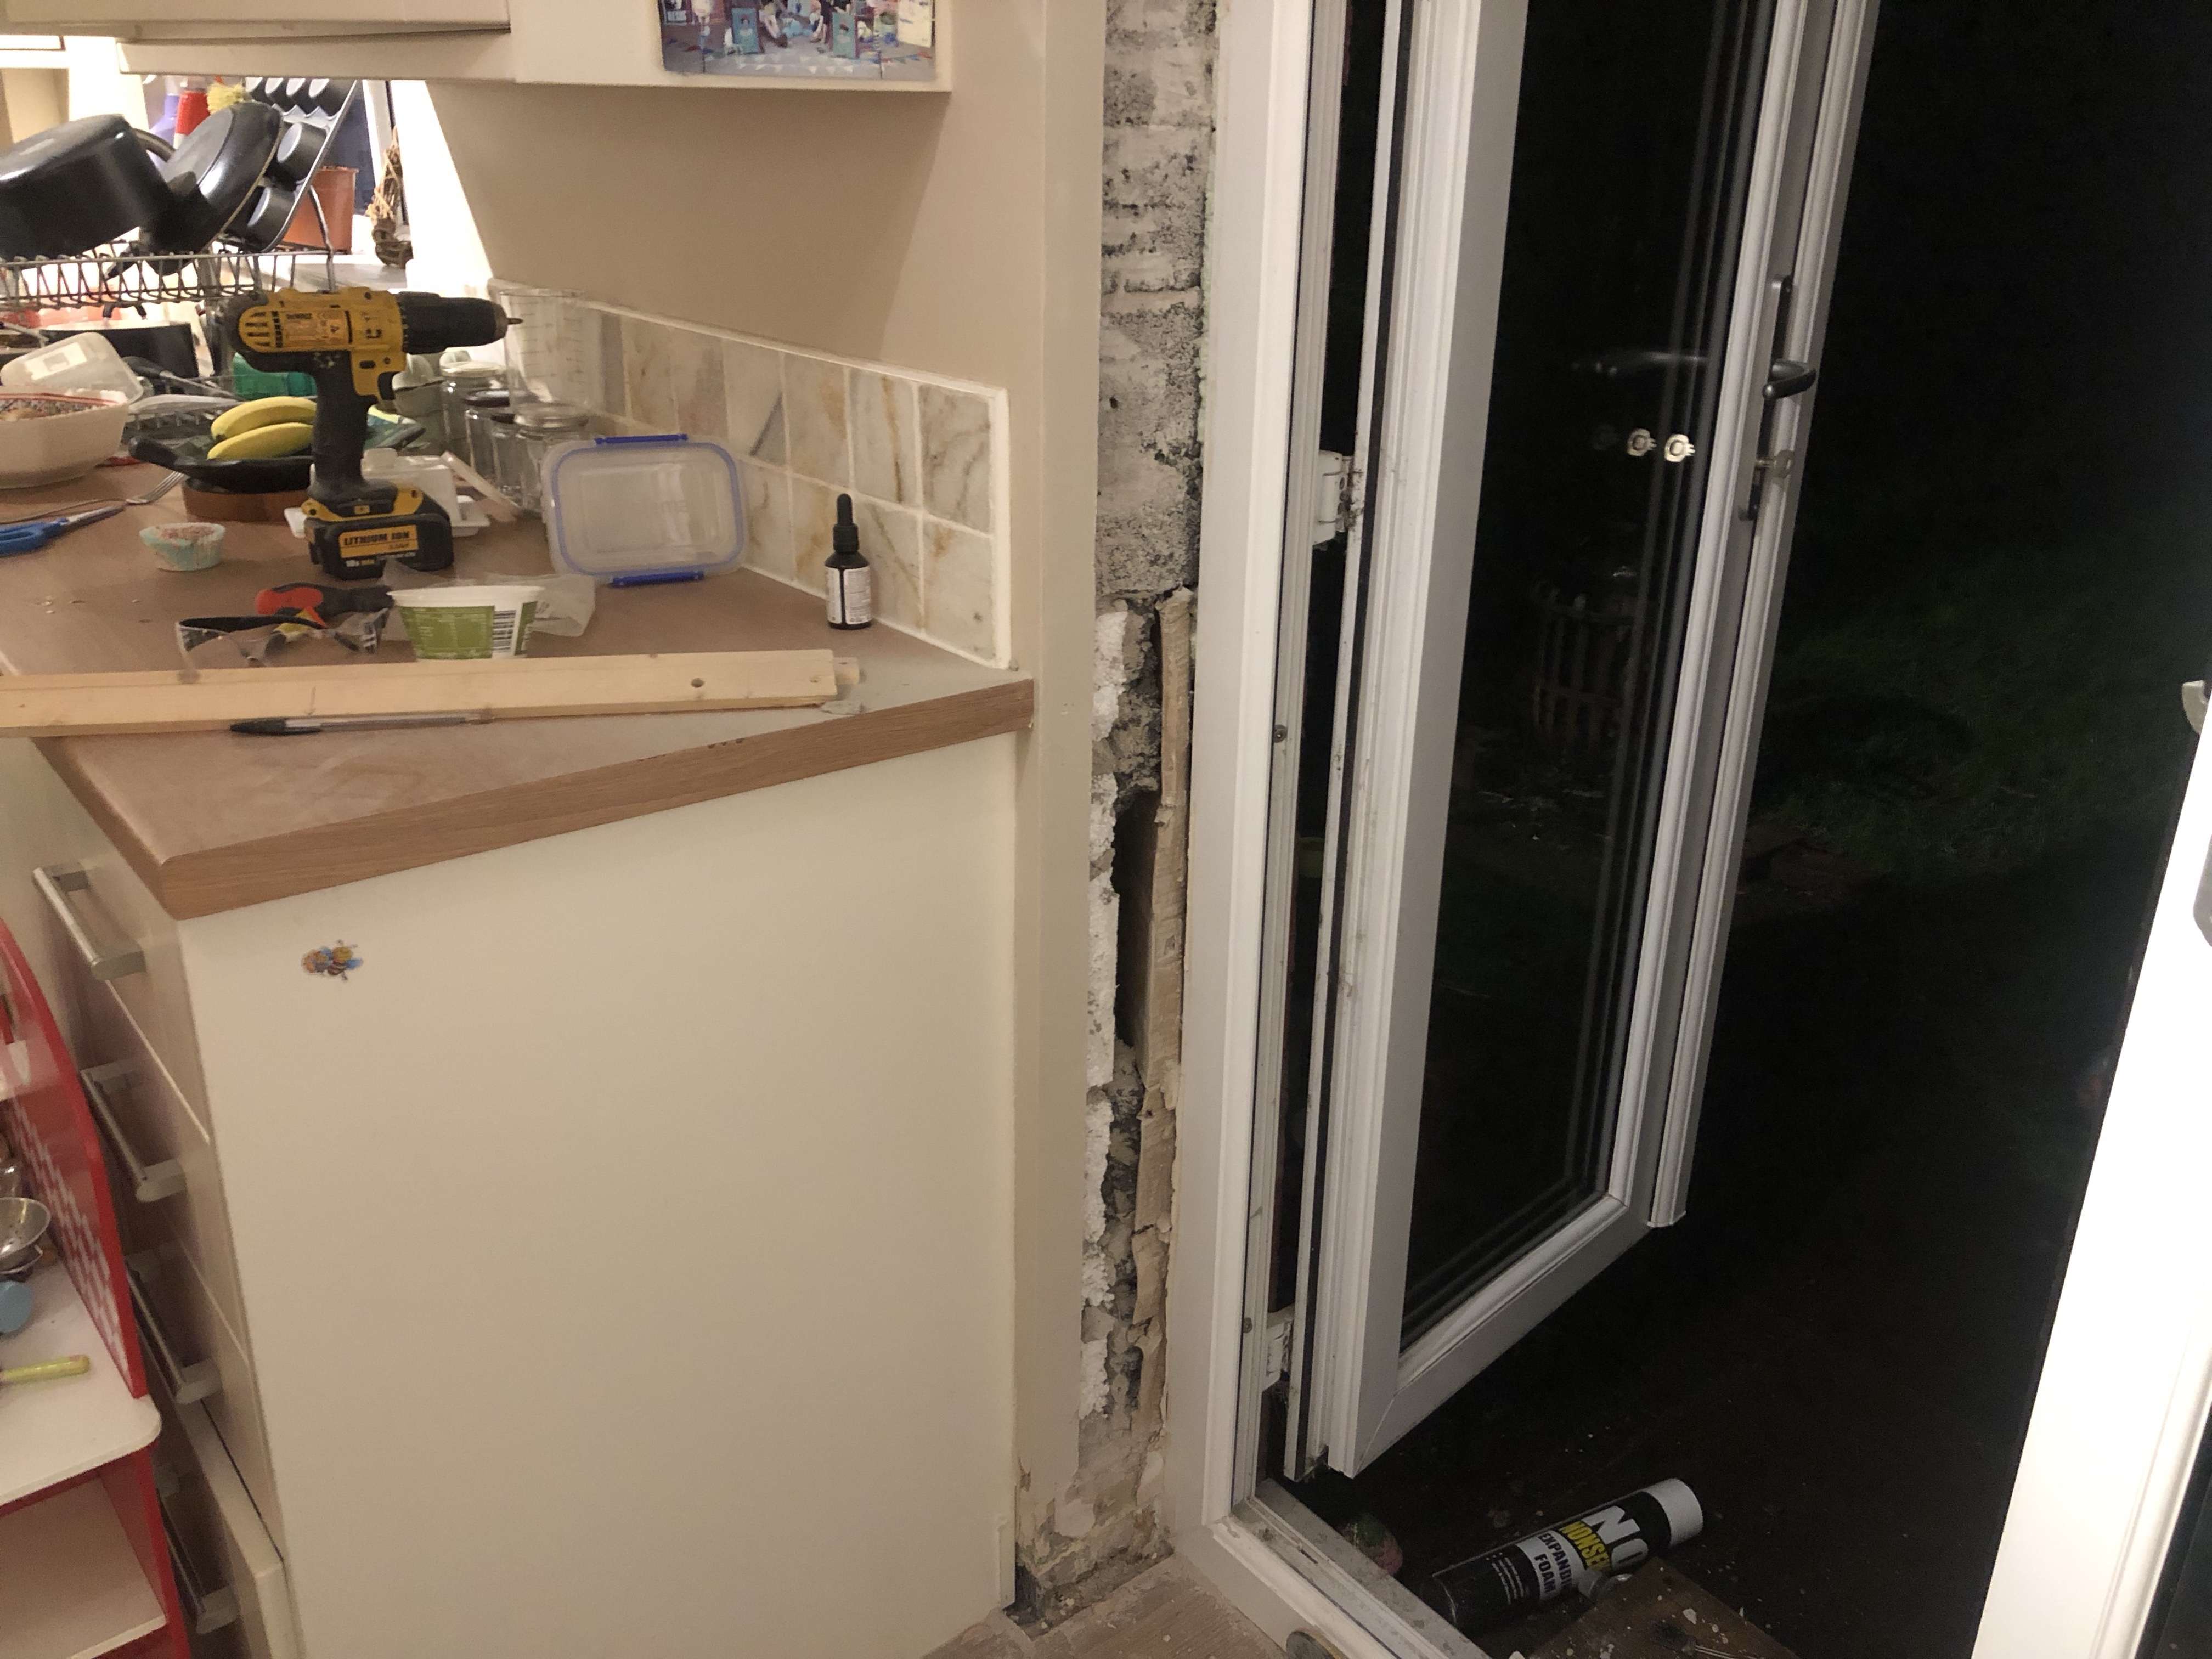
Originally, the opening was L-shaped with a single door with a connected window. At some point it was roughly converted into a double door by chiselling down the brick line.
In the process, they badly broke both skins of brick and didn’t repair them. The inner skin has hollow blocks filled with polystyrene which is what you can see in the image. These have broken awkwardly and not been repaired.
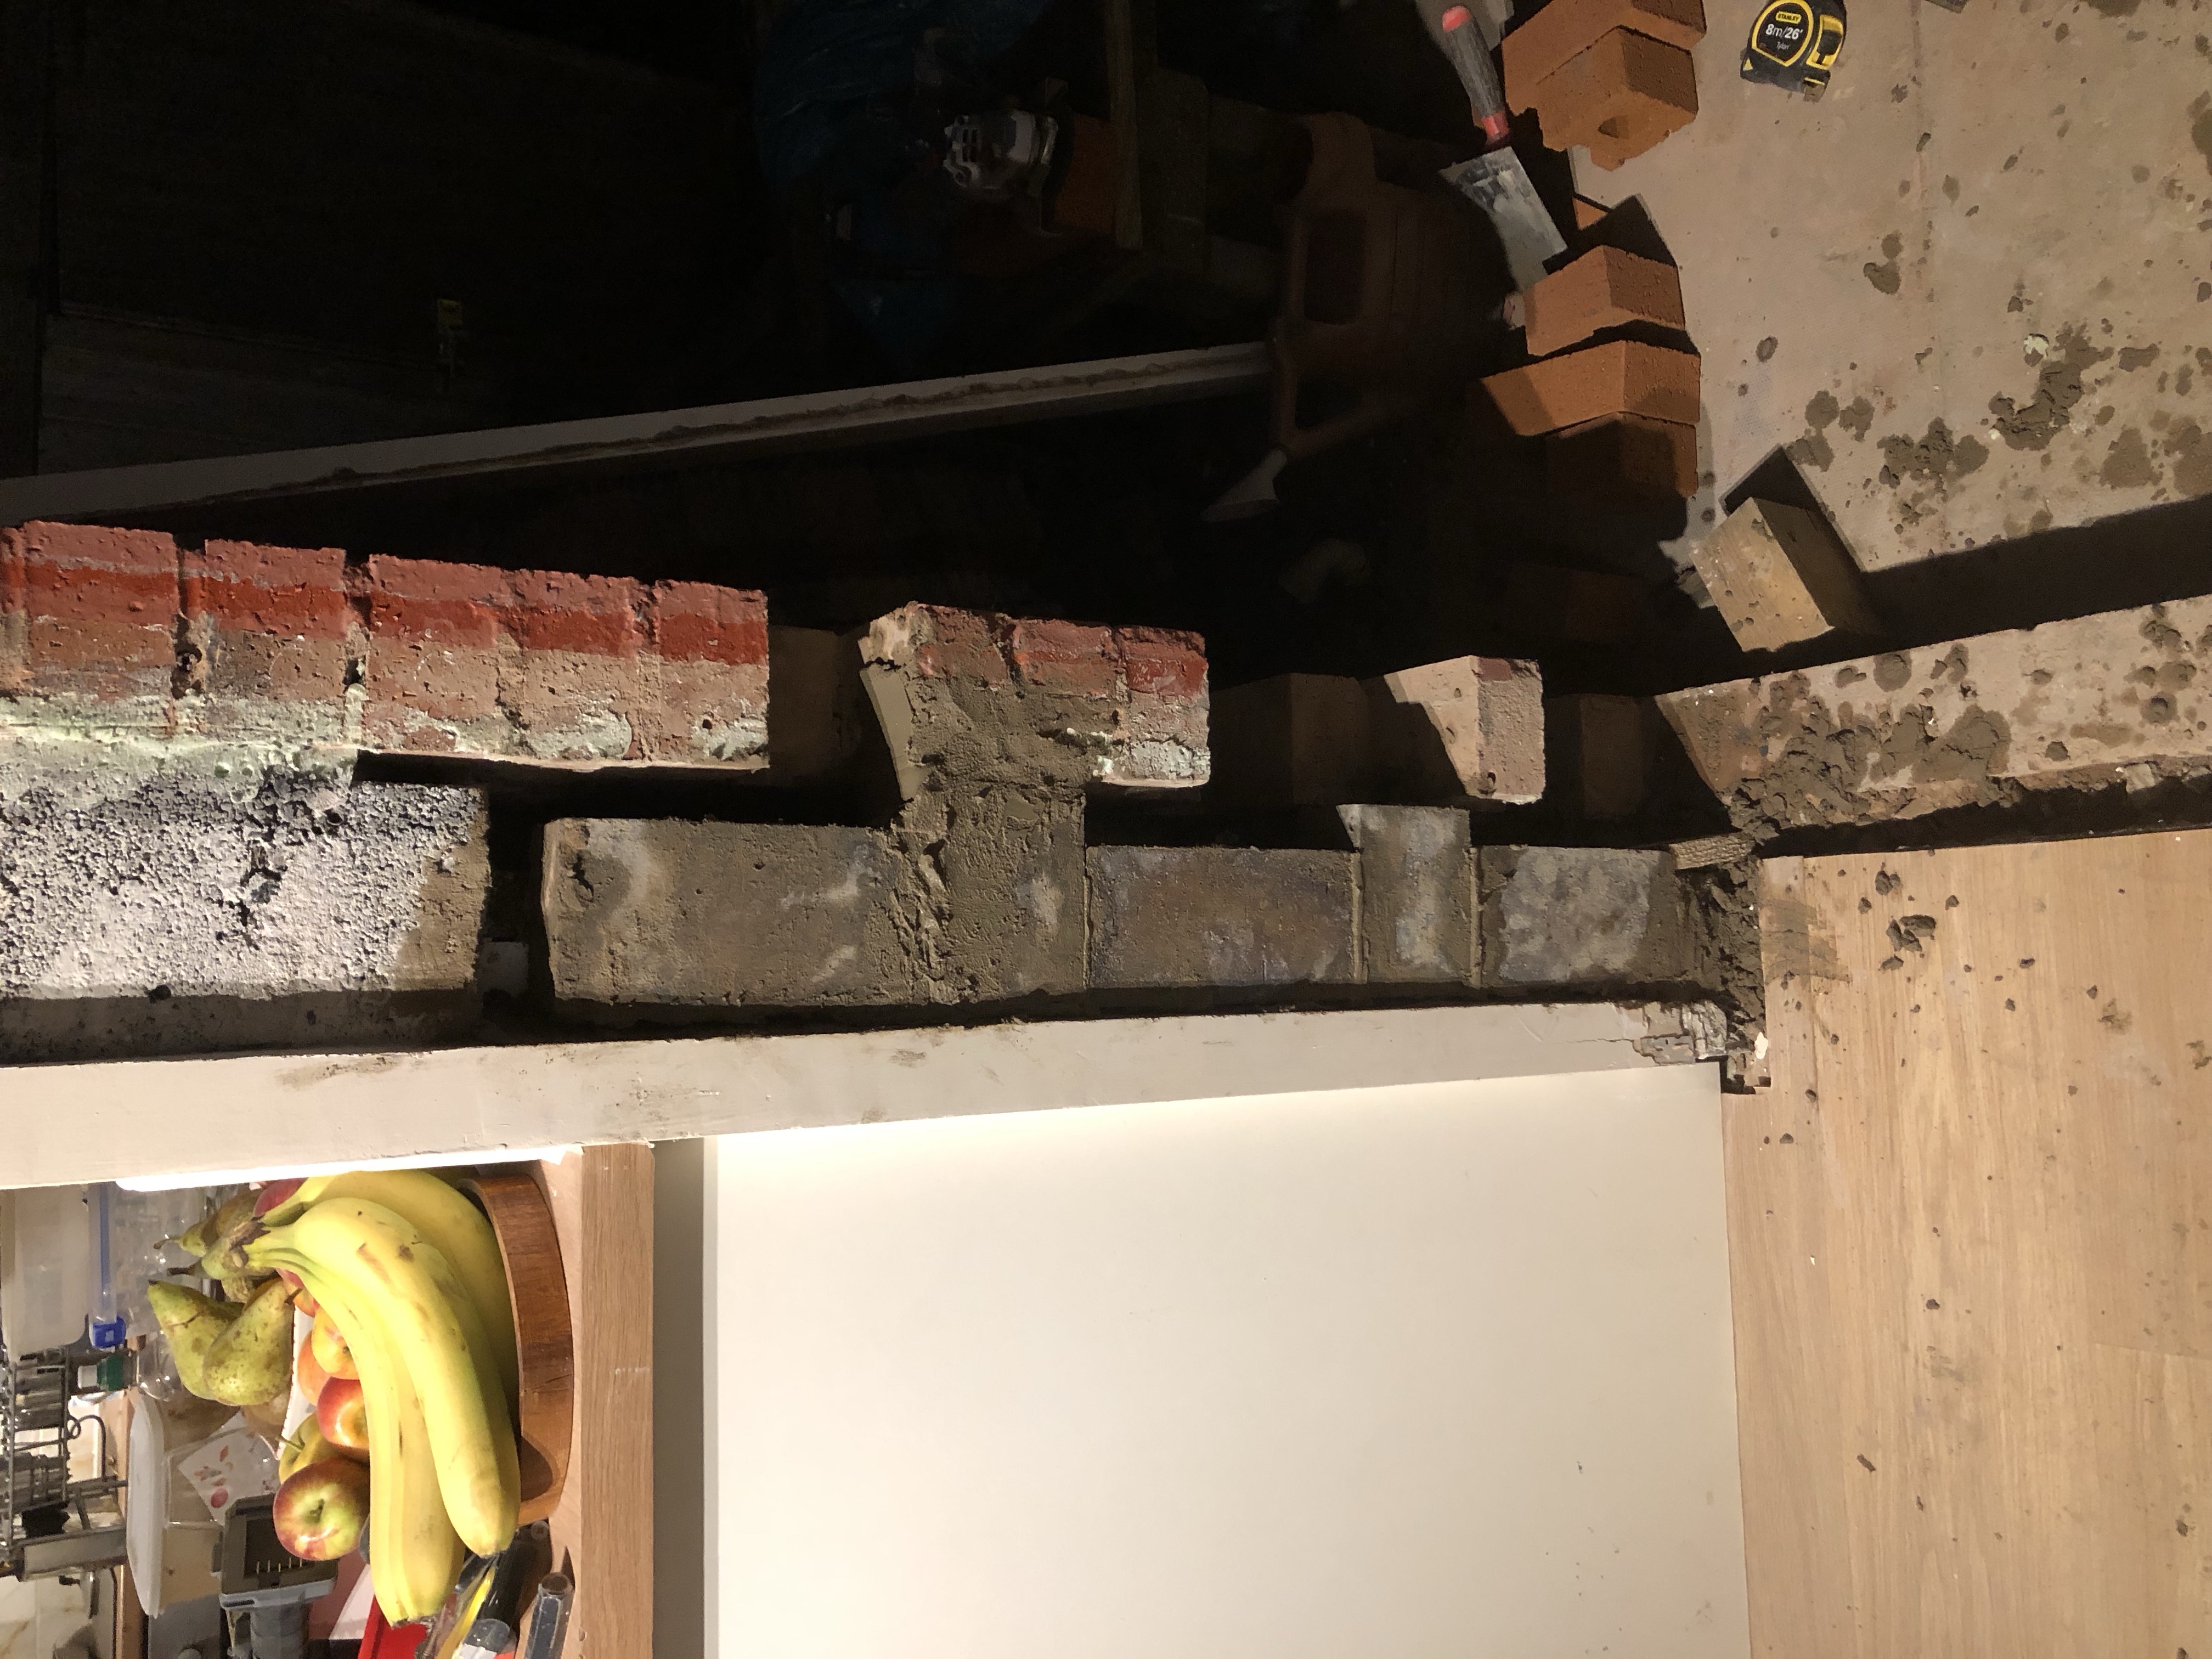
The outer skin was broken too: once the uPVC trim was removed, I could see that the outer skin of red bricks had been broken and patched up with mortar:
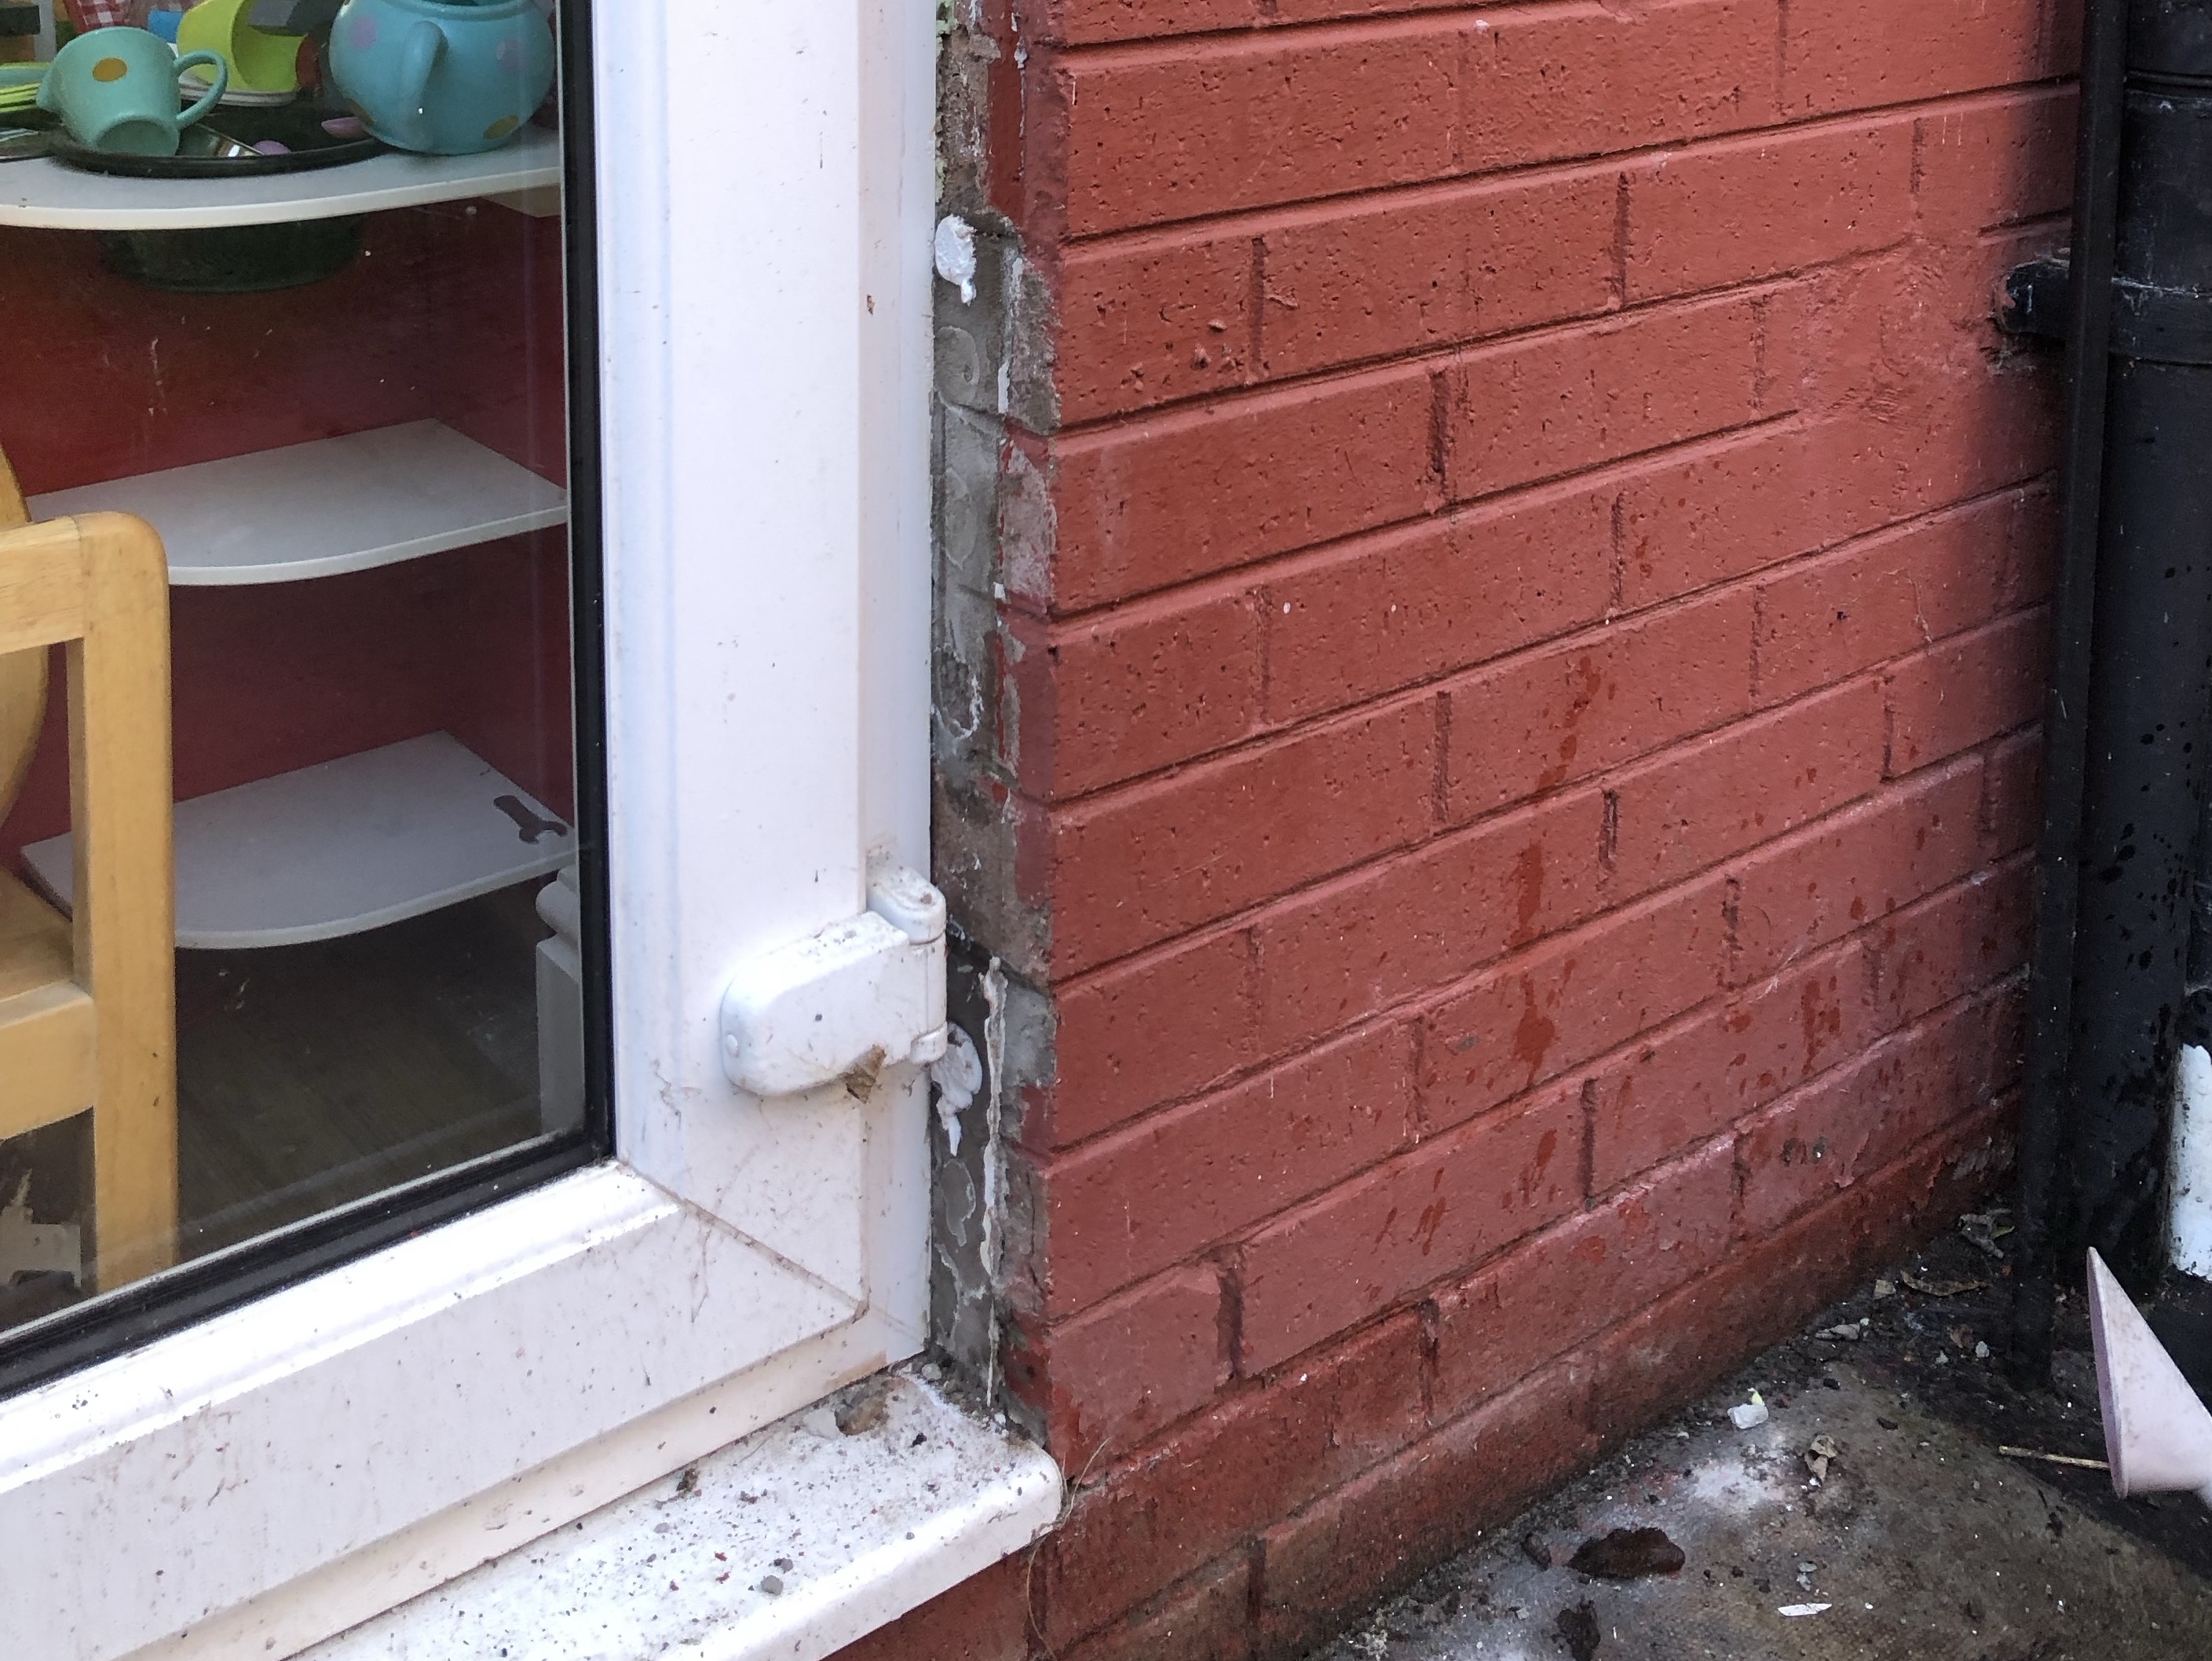
With the trim removed, I could poke my finger all the way round the door frame!
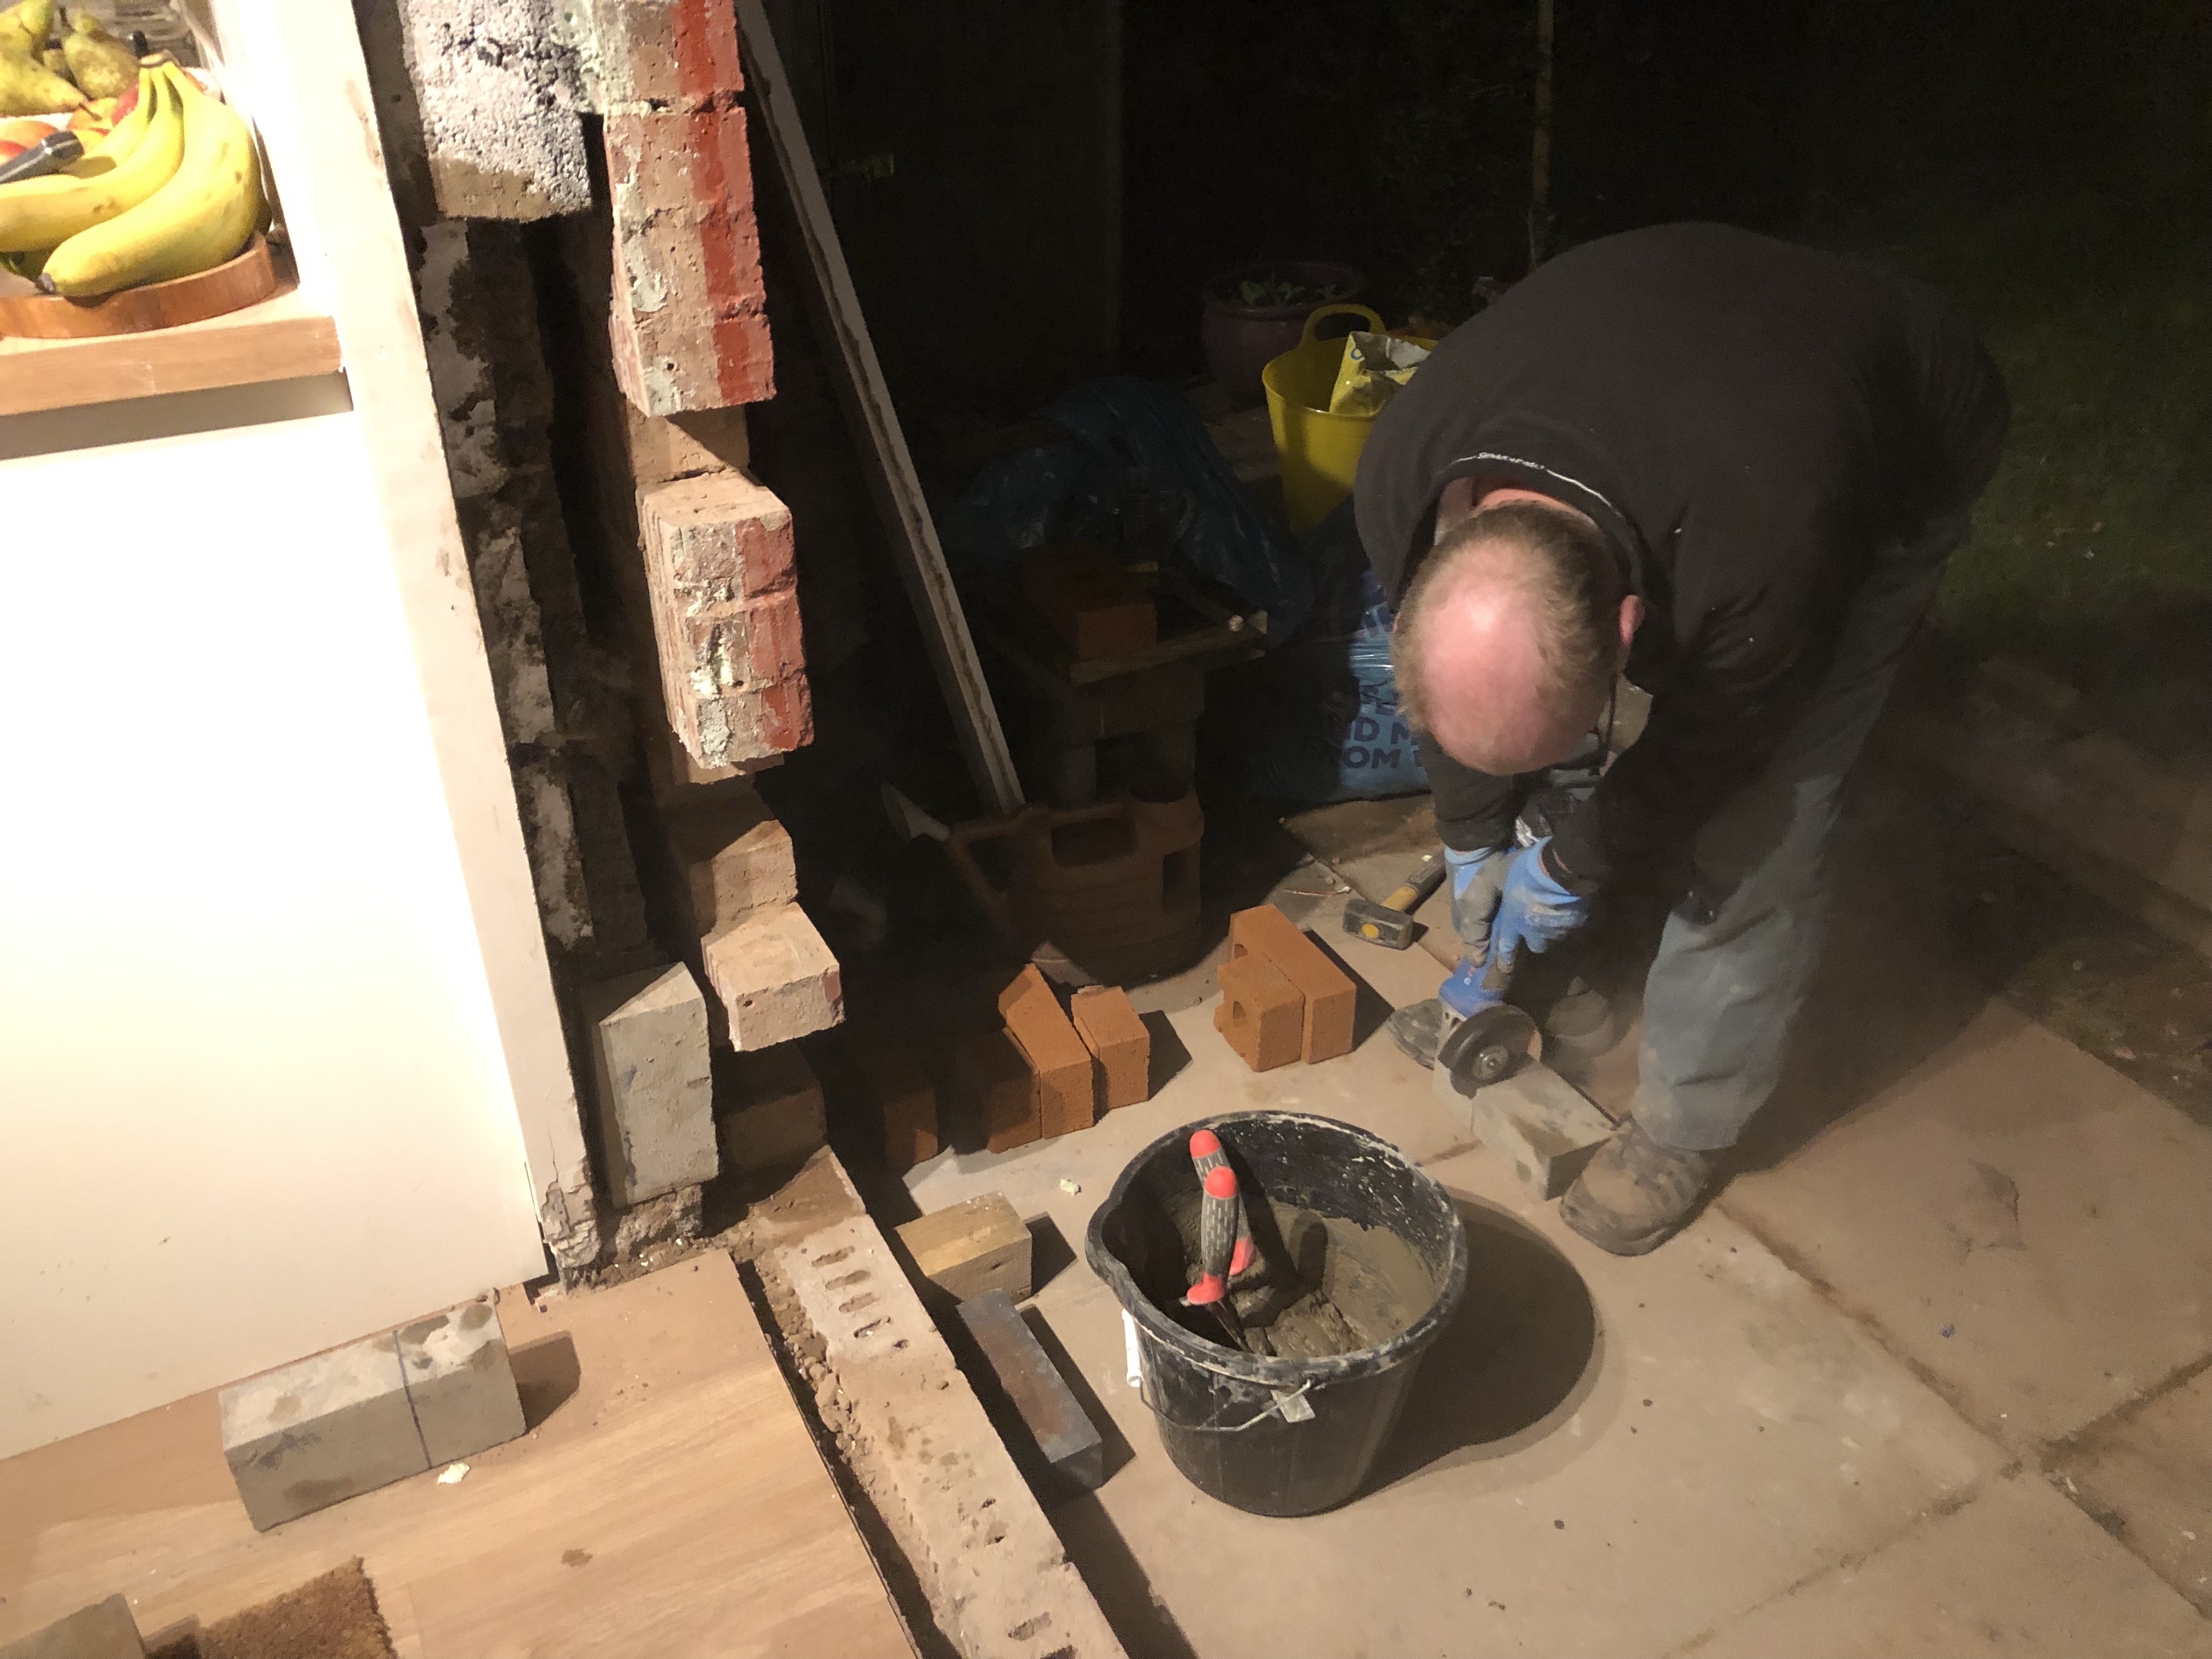
Lisa’s Dad to the rescue! He took a sample of brick to the local brickyard and sourced some new matching red “Trafford bricks” and a few engineering bricks to repair the inside.
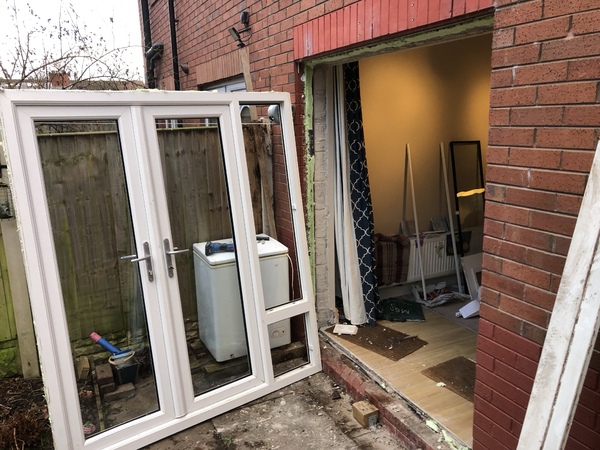
Repairing the wall was a big job. We took the door out and re-built the inner skin first.
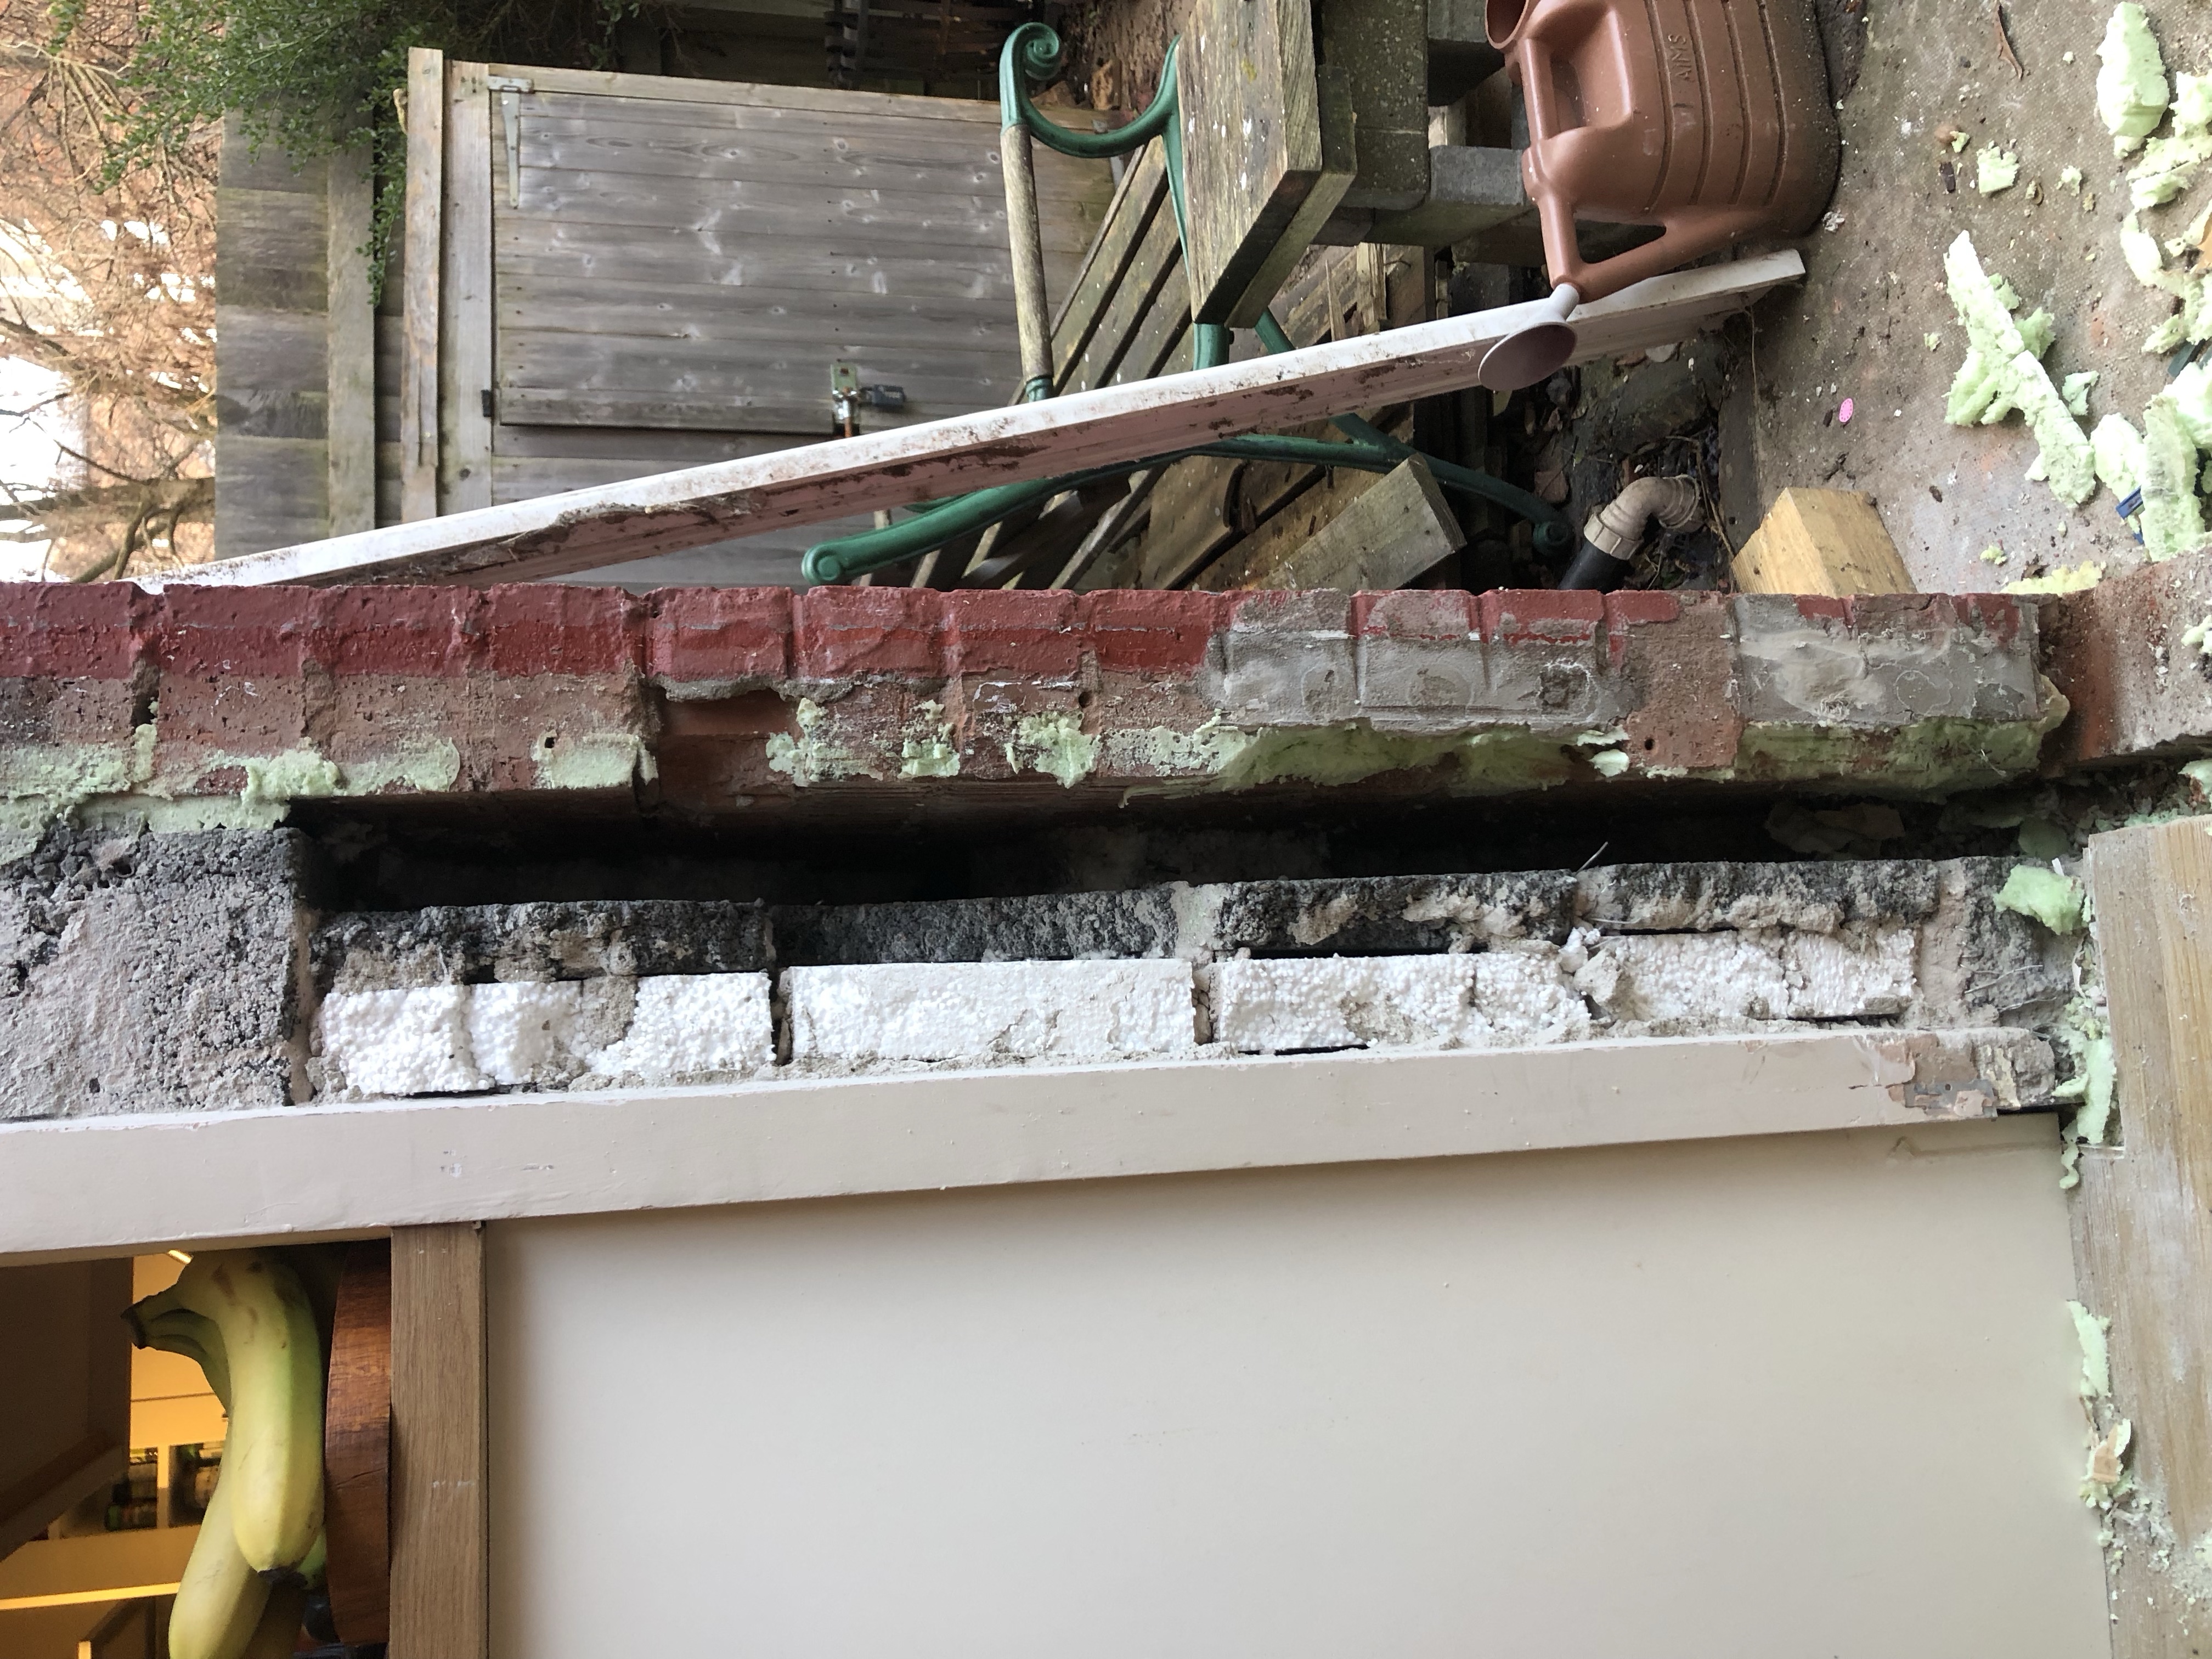
We chiselled out the broken Trafford bricks and cut new ones to size.
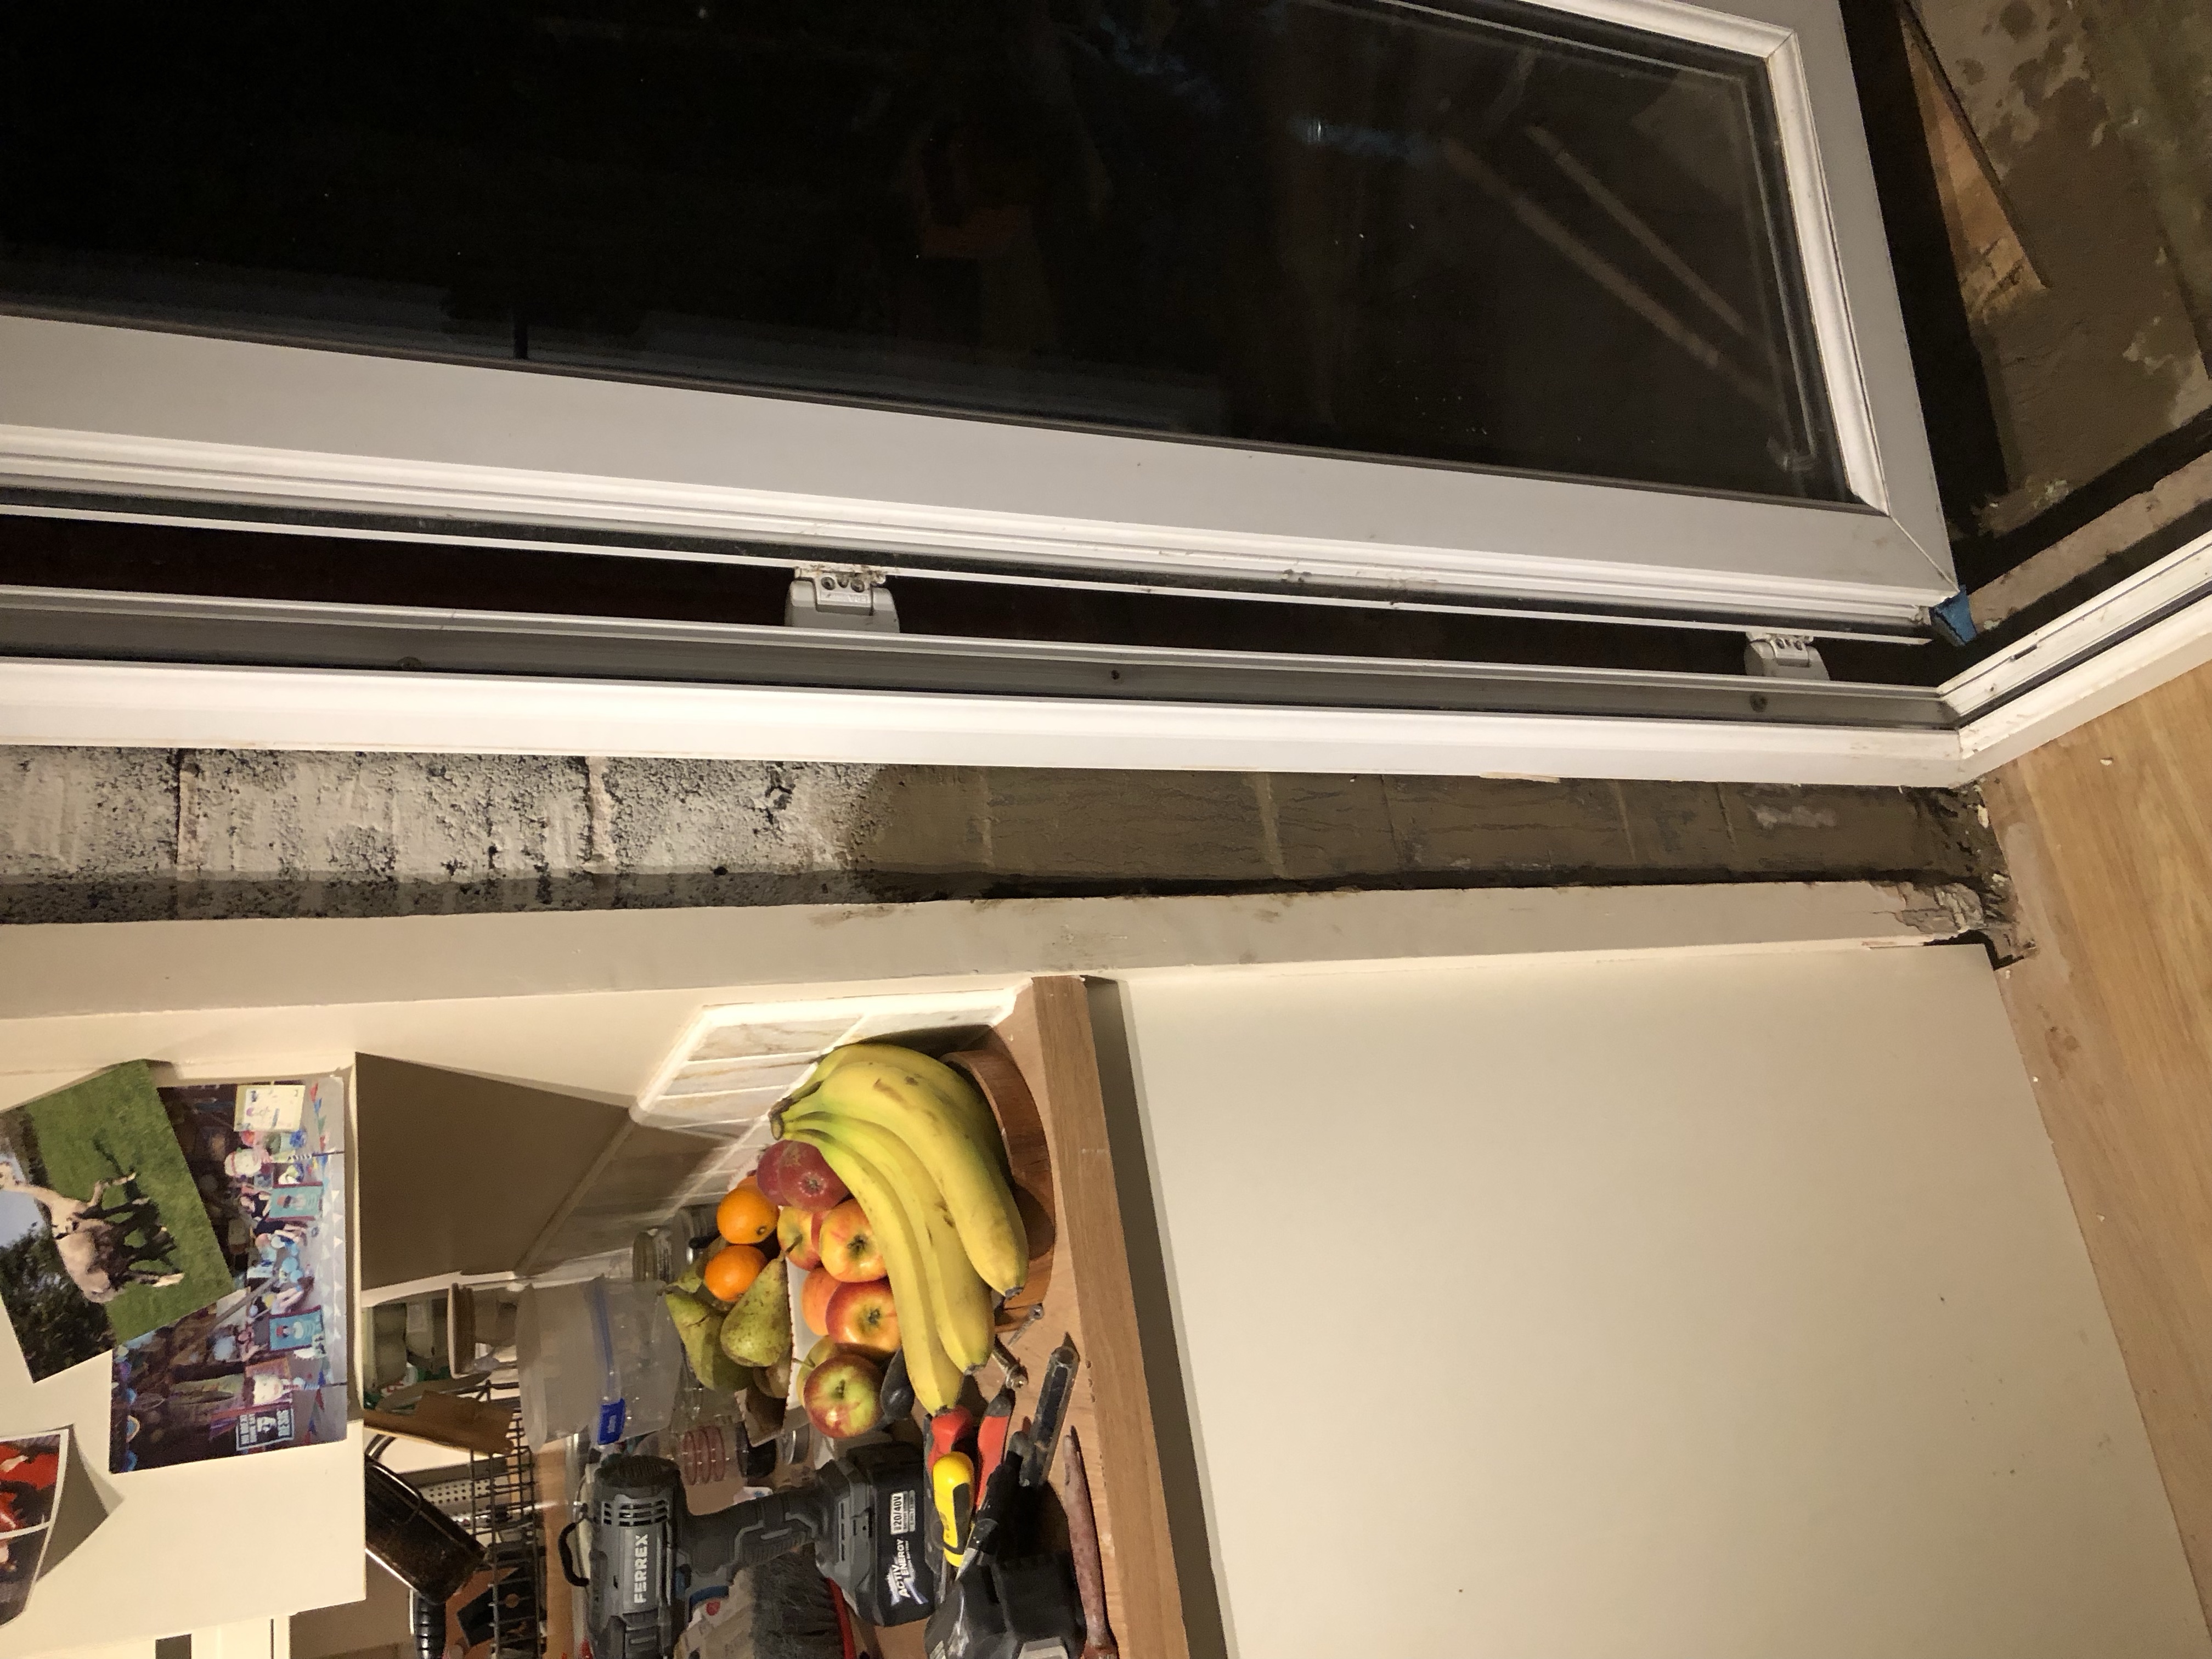
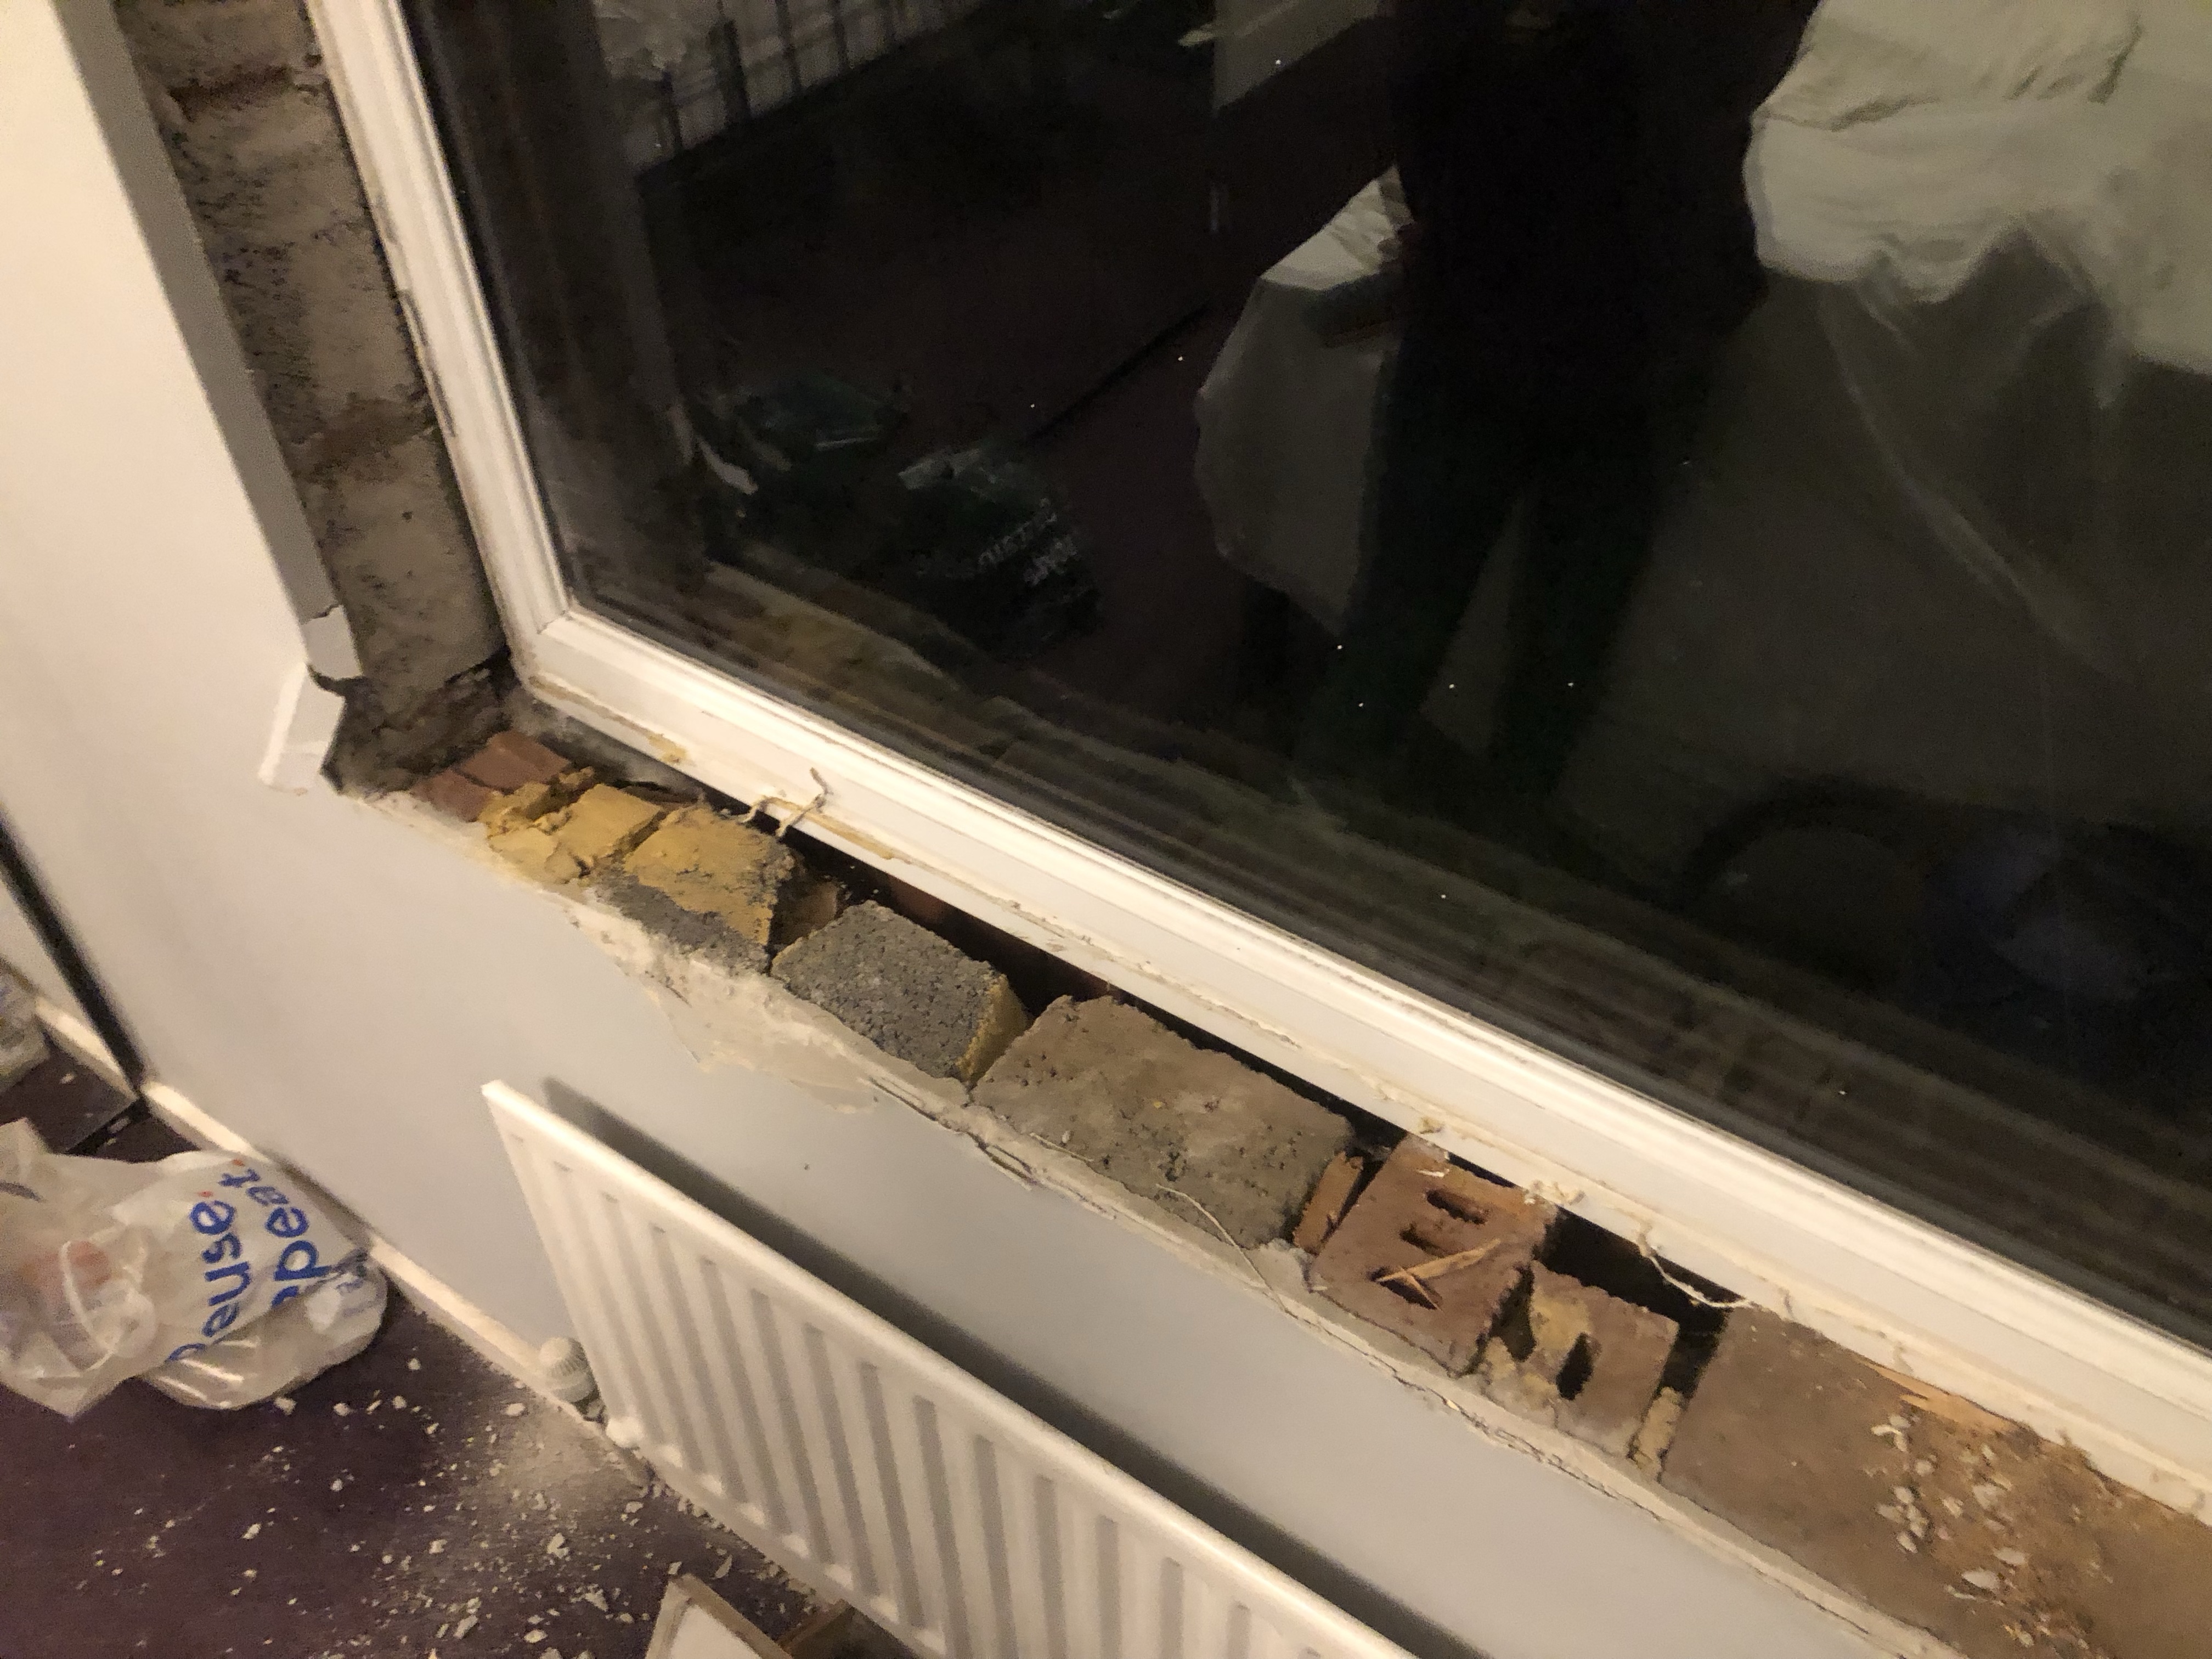
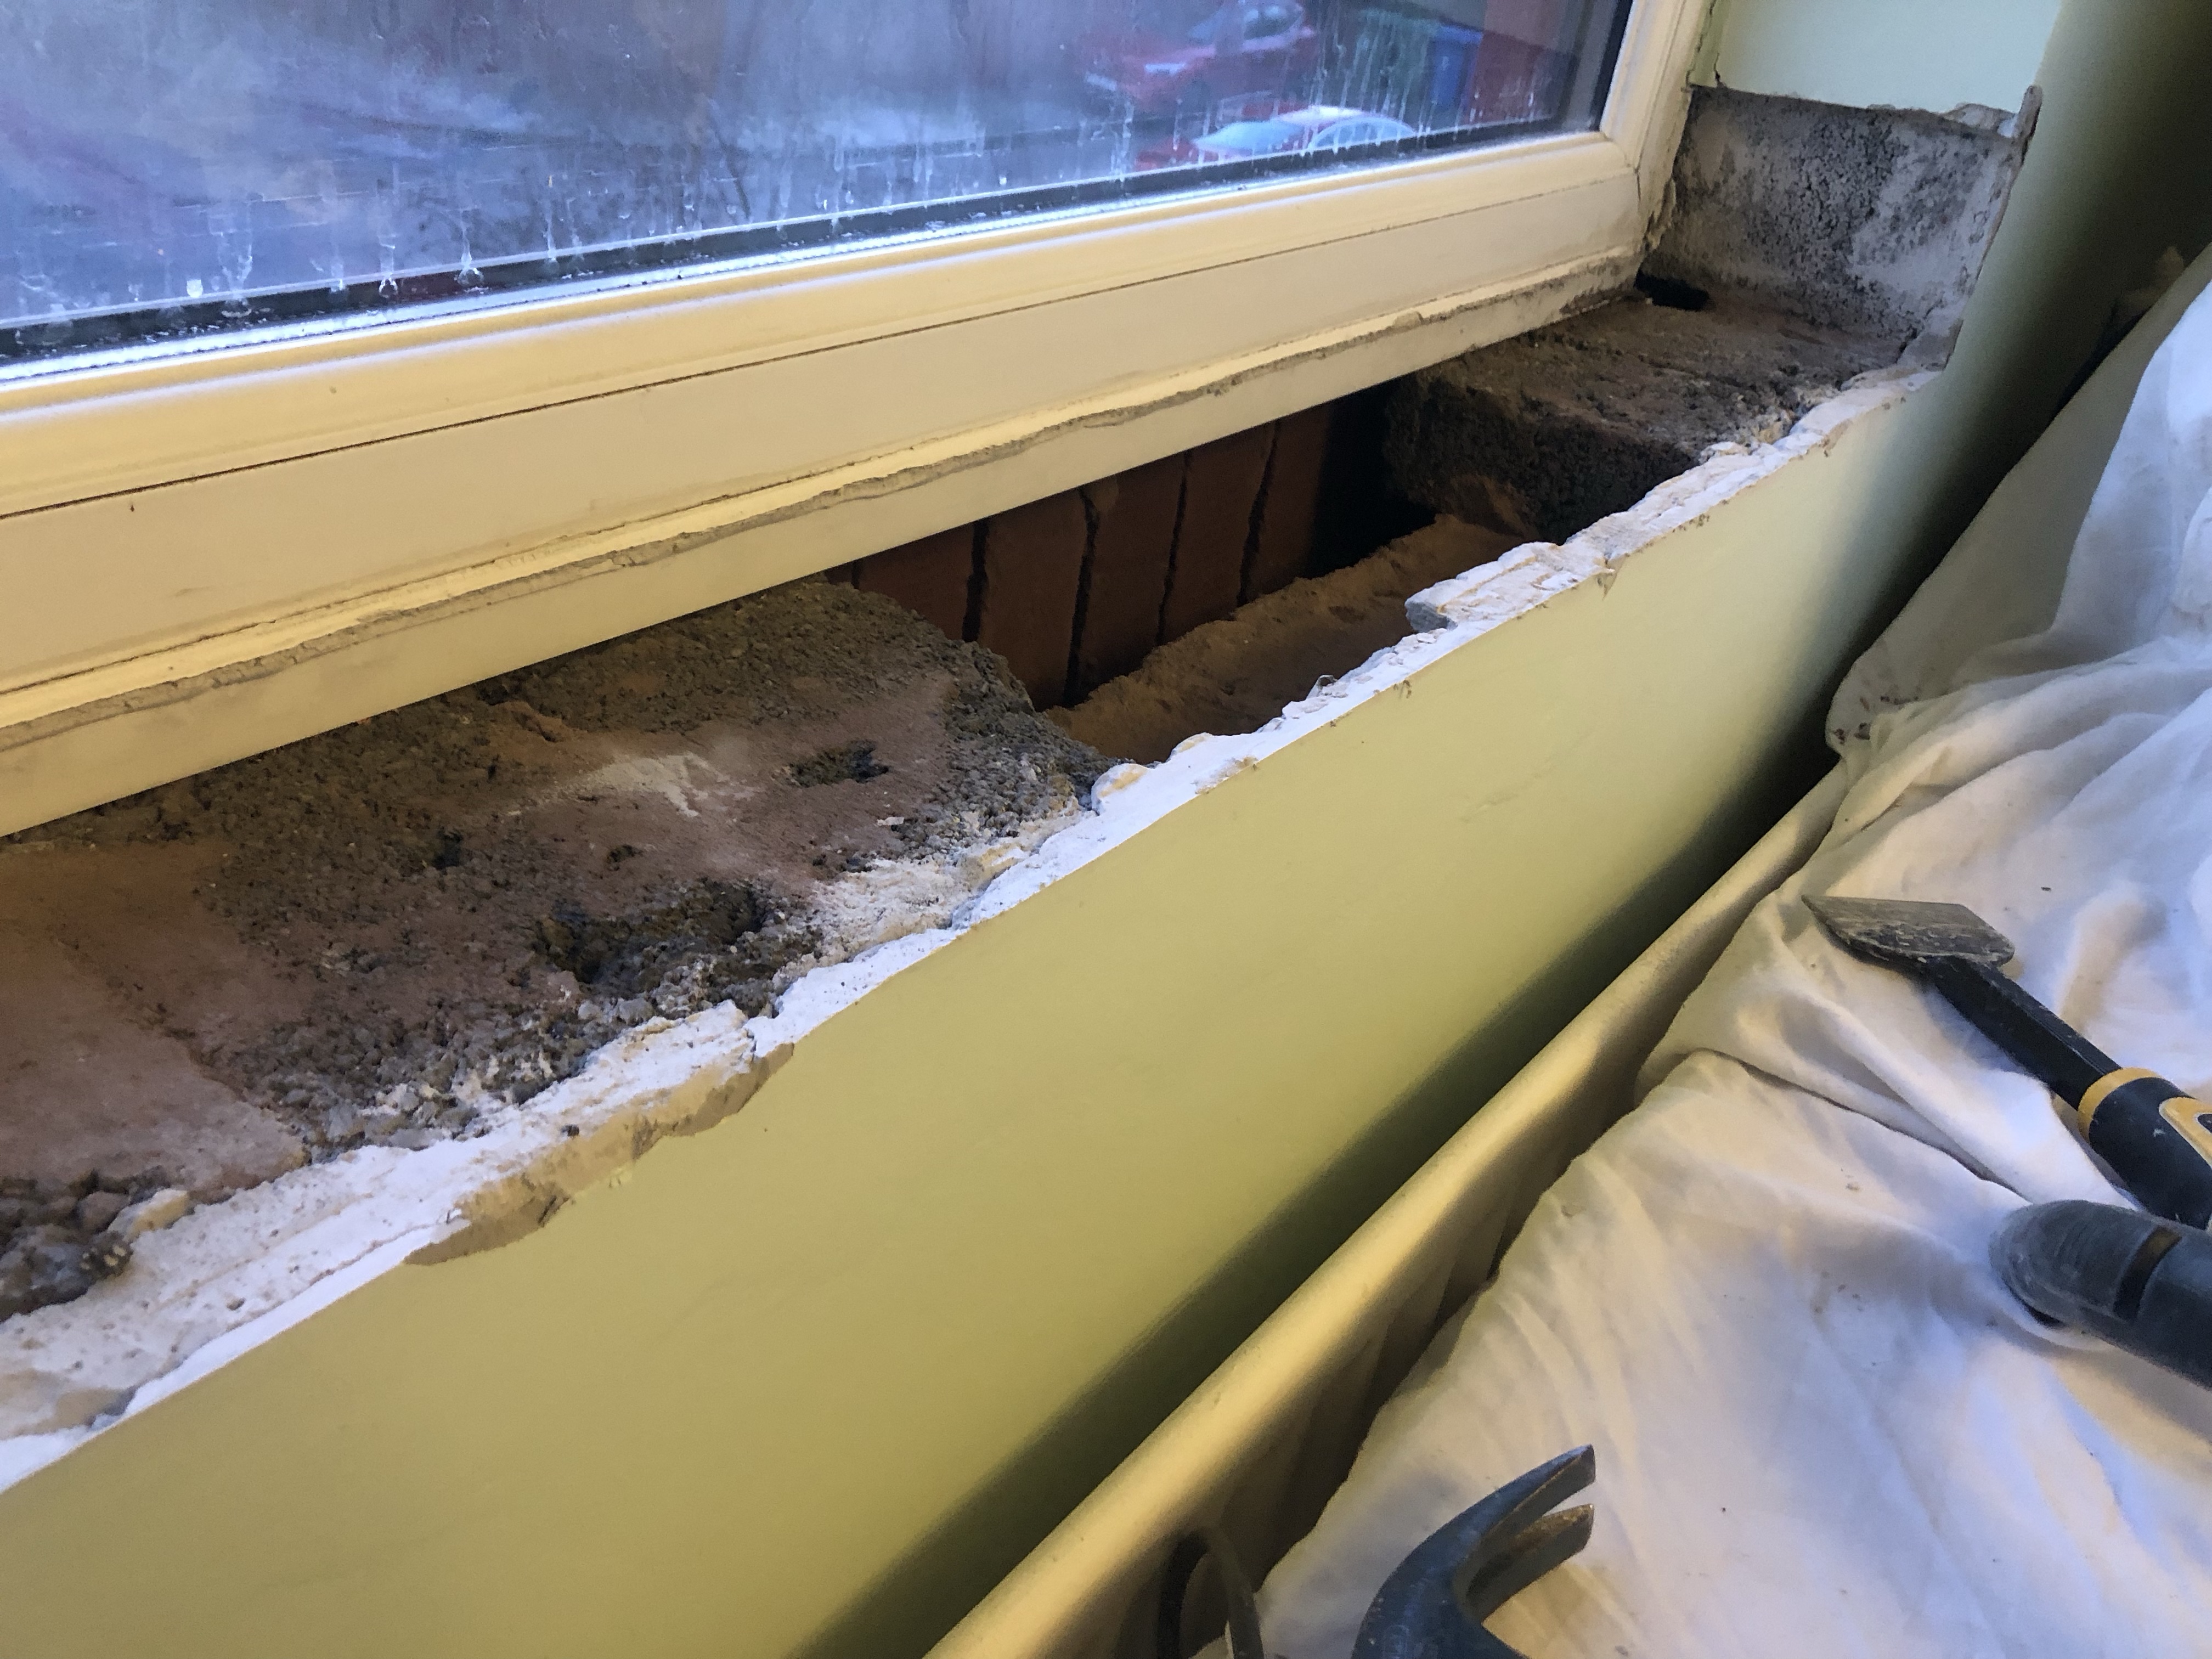
Master bedroom: bricks missing
I took up the window cills in every room. Easier said than done as most had been plastered over.
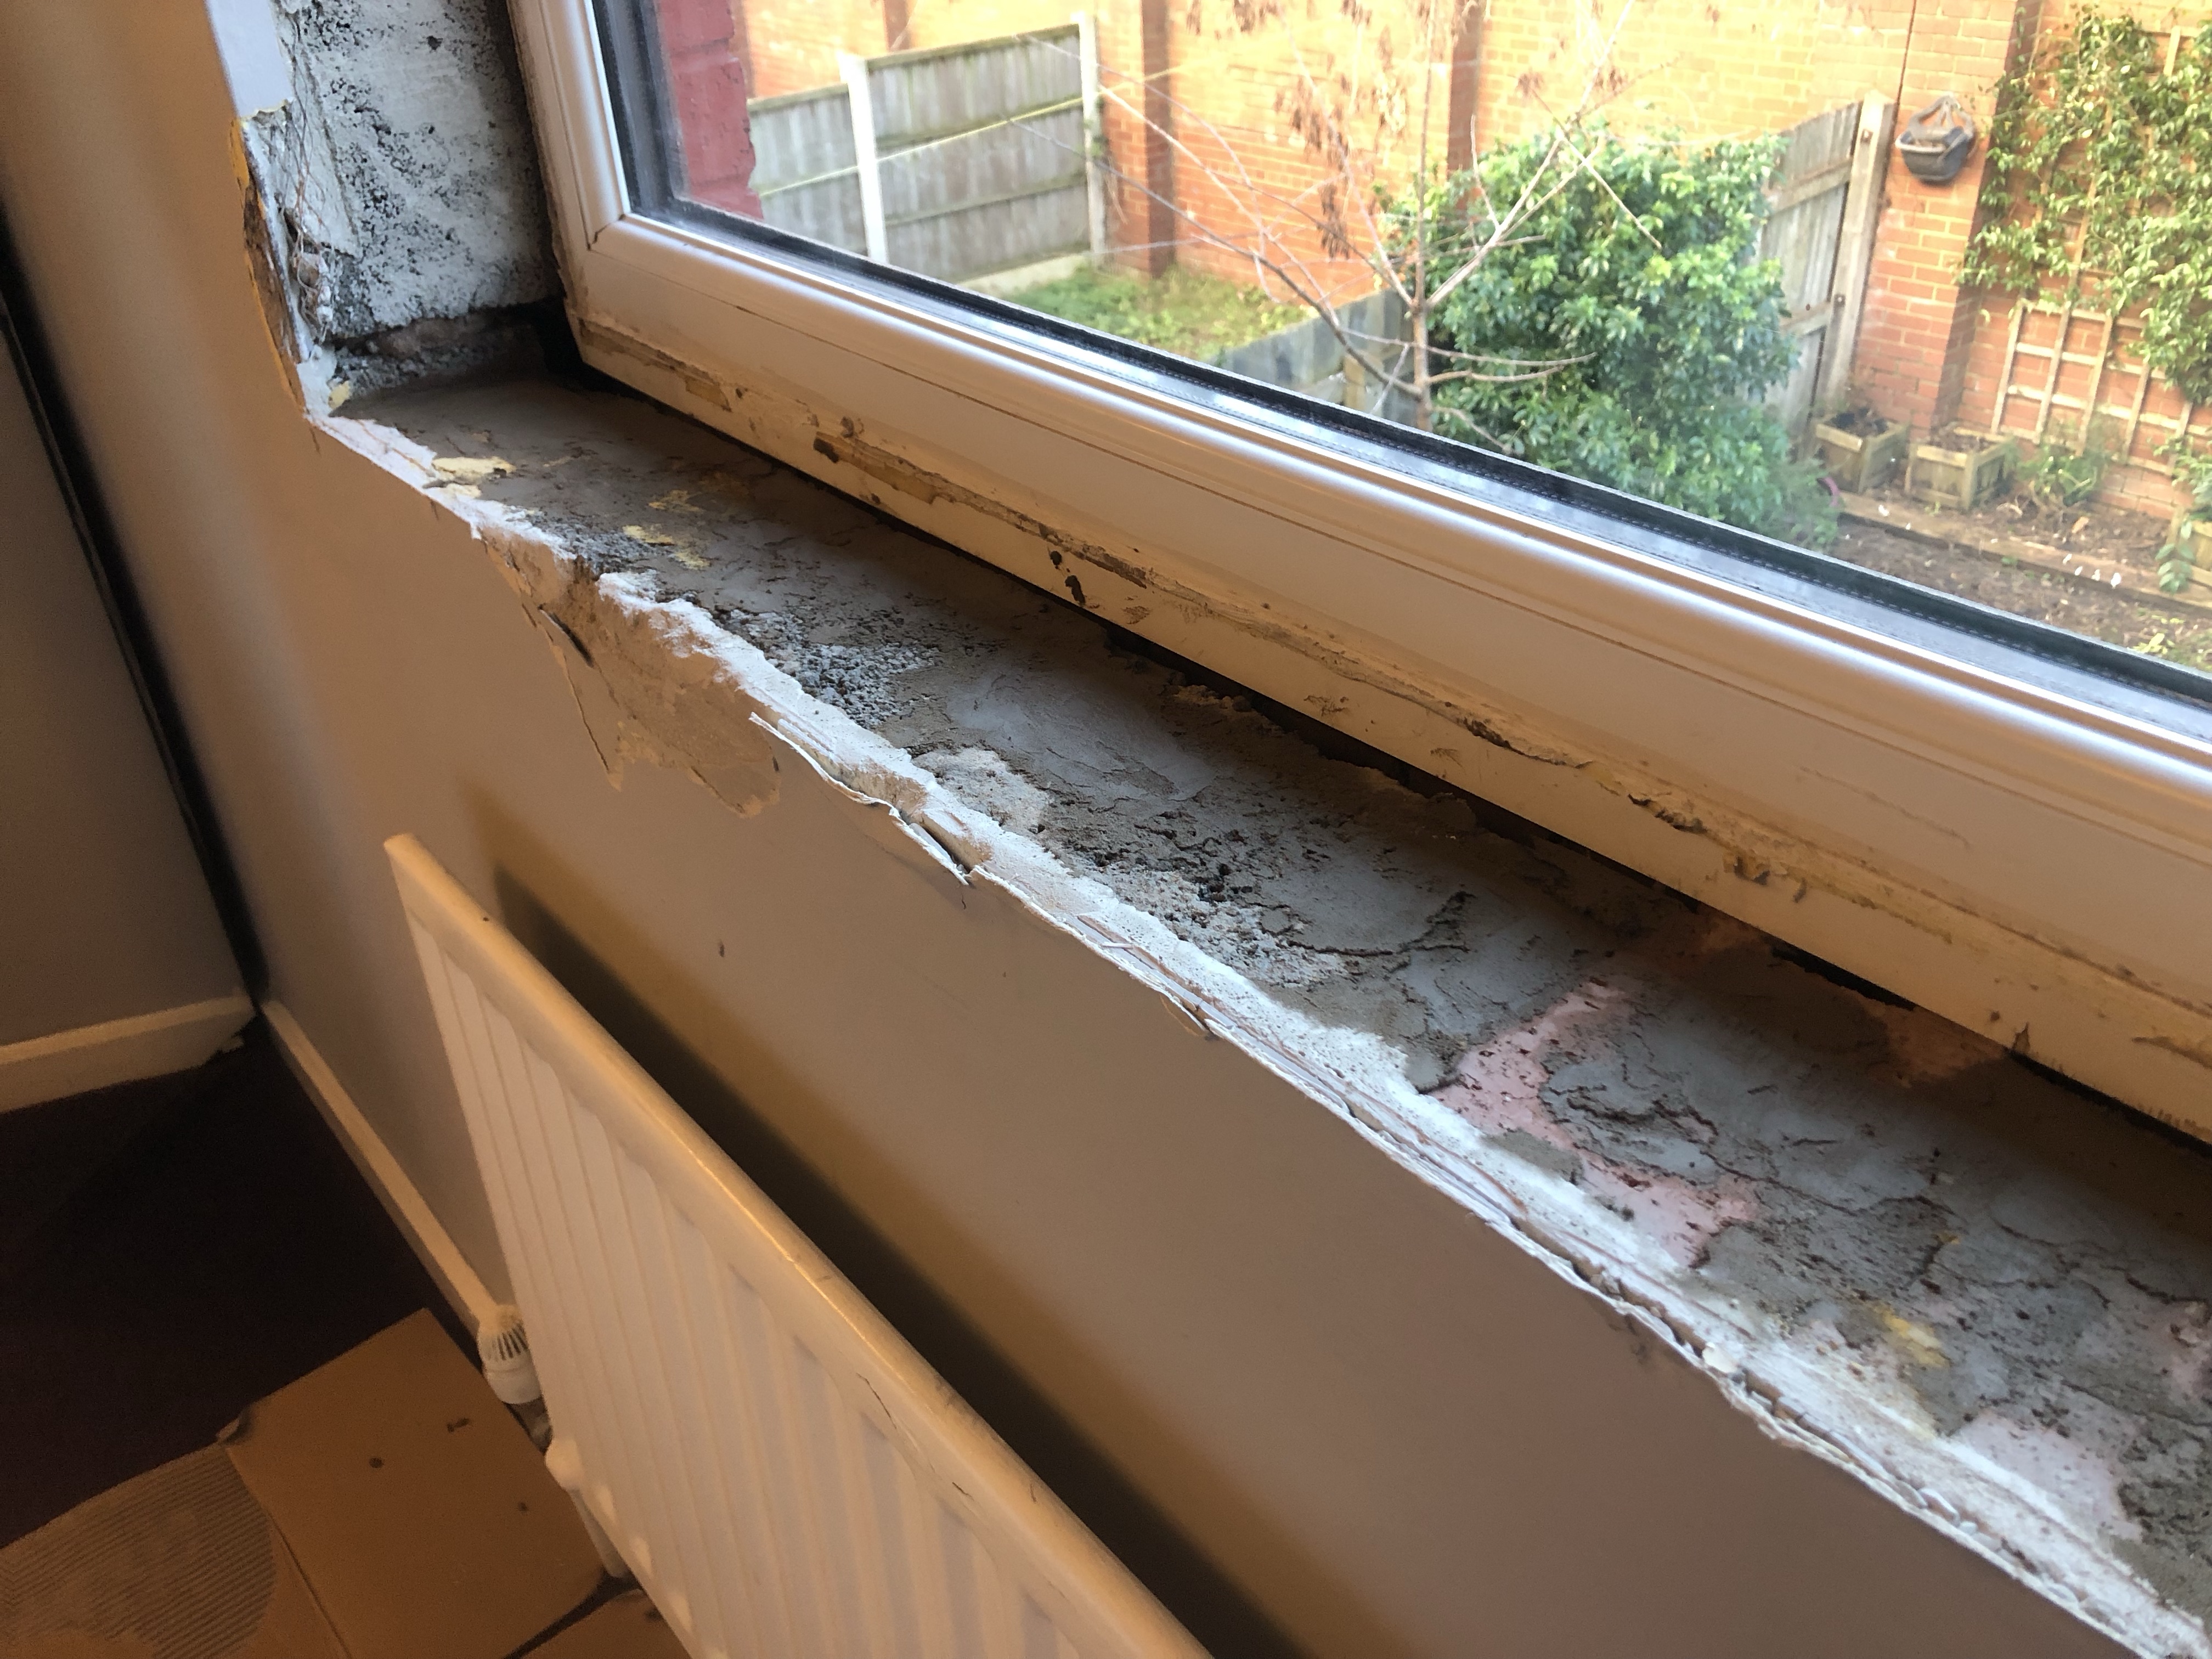
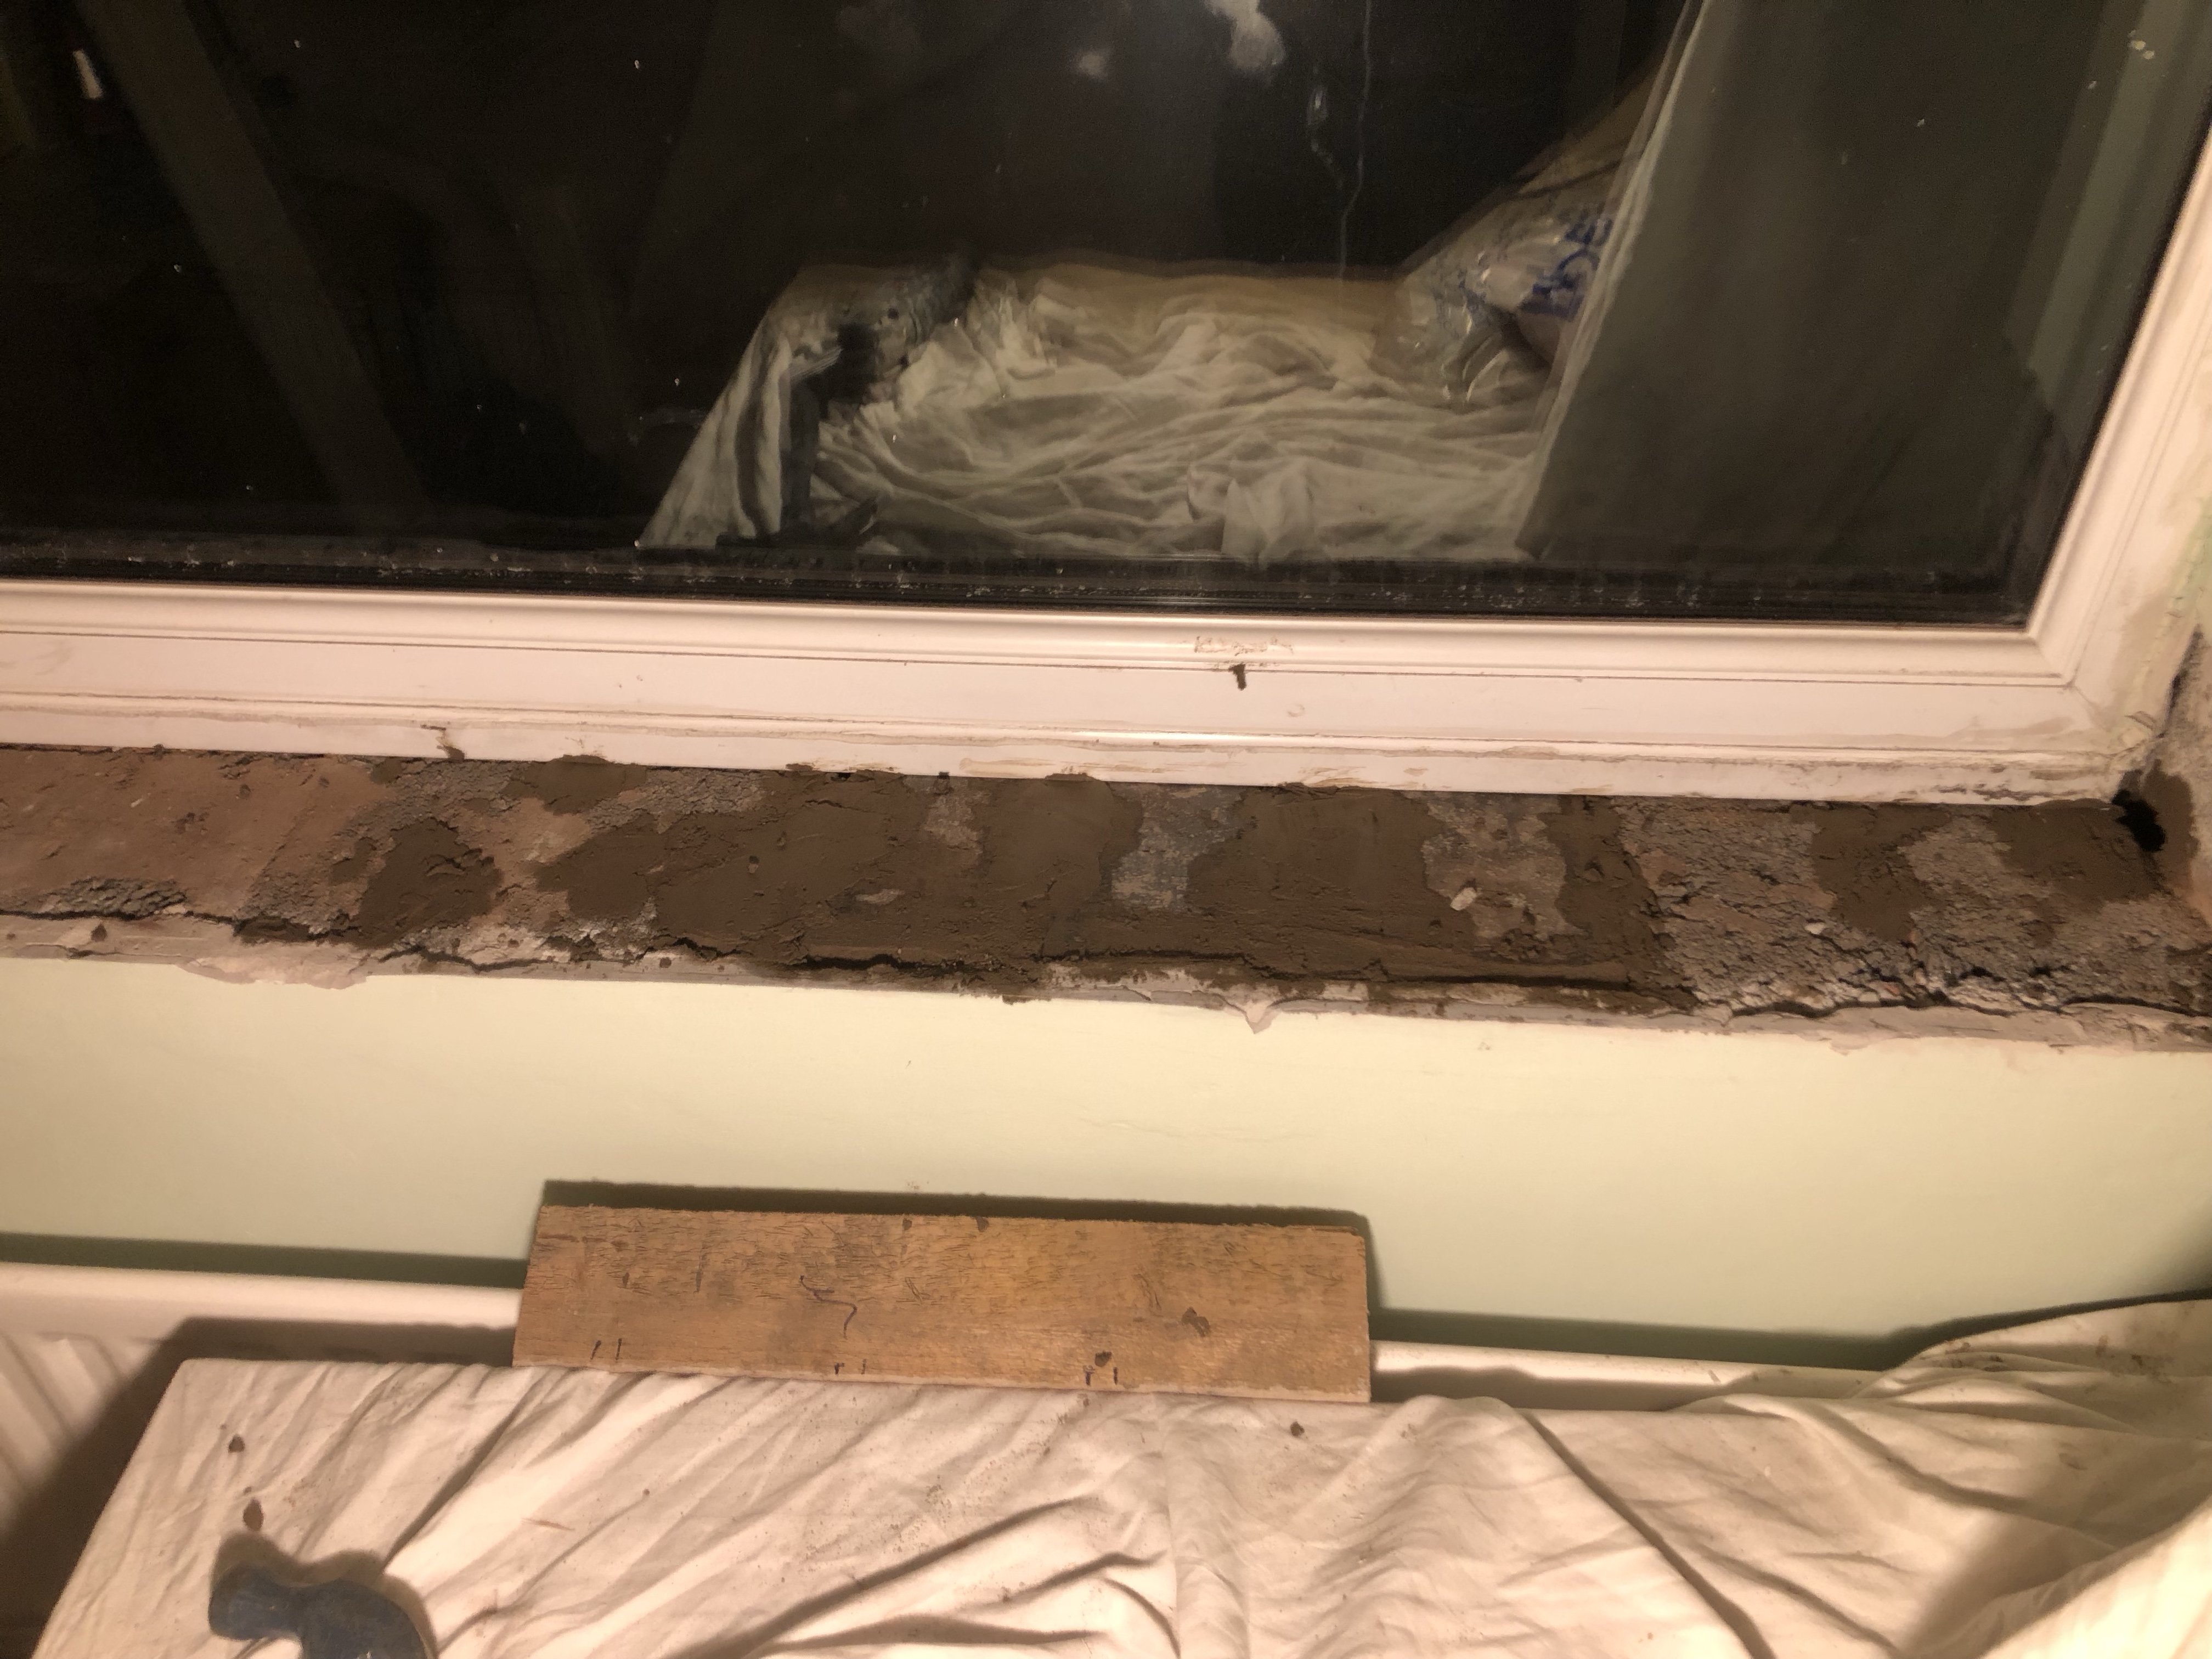
The wall beneath the cill in the master bedroom was a mess:
But it was easily repaired by stuffing it with mortar:
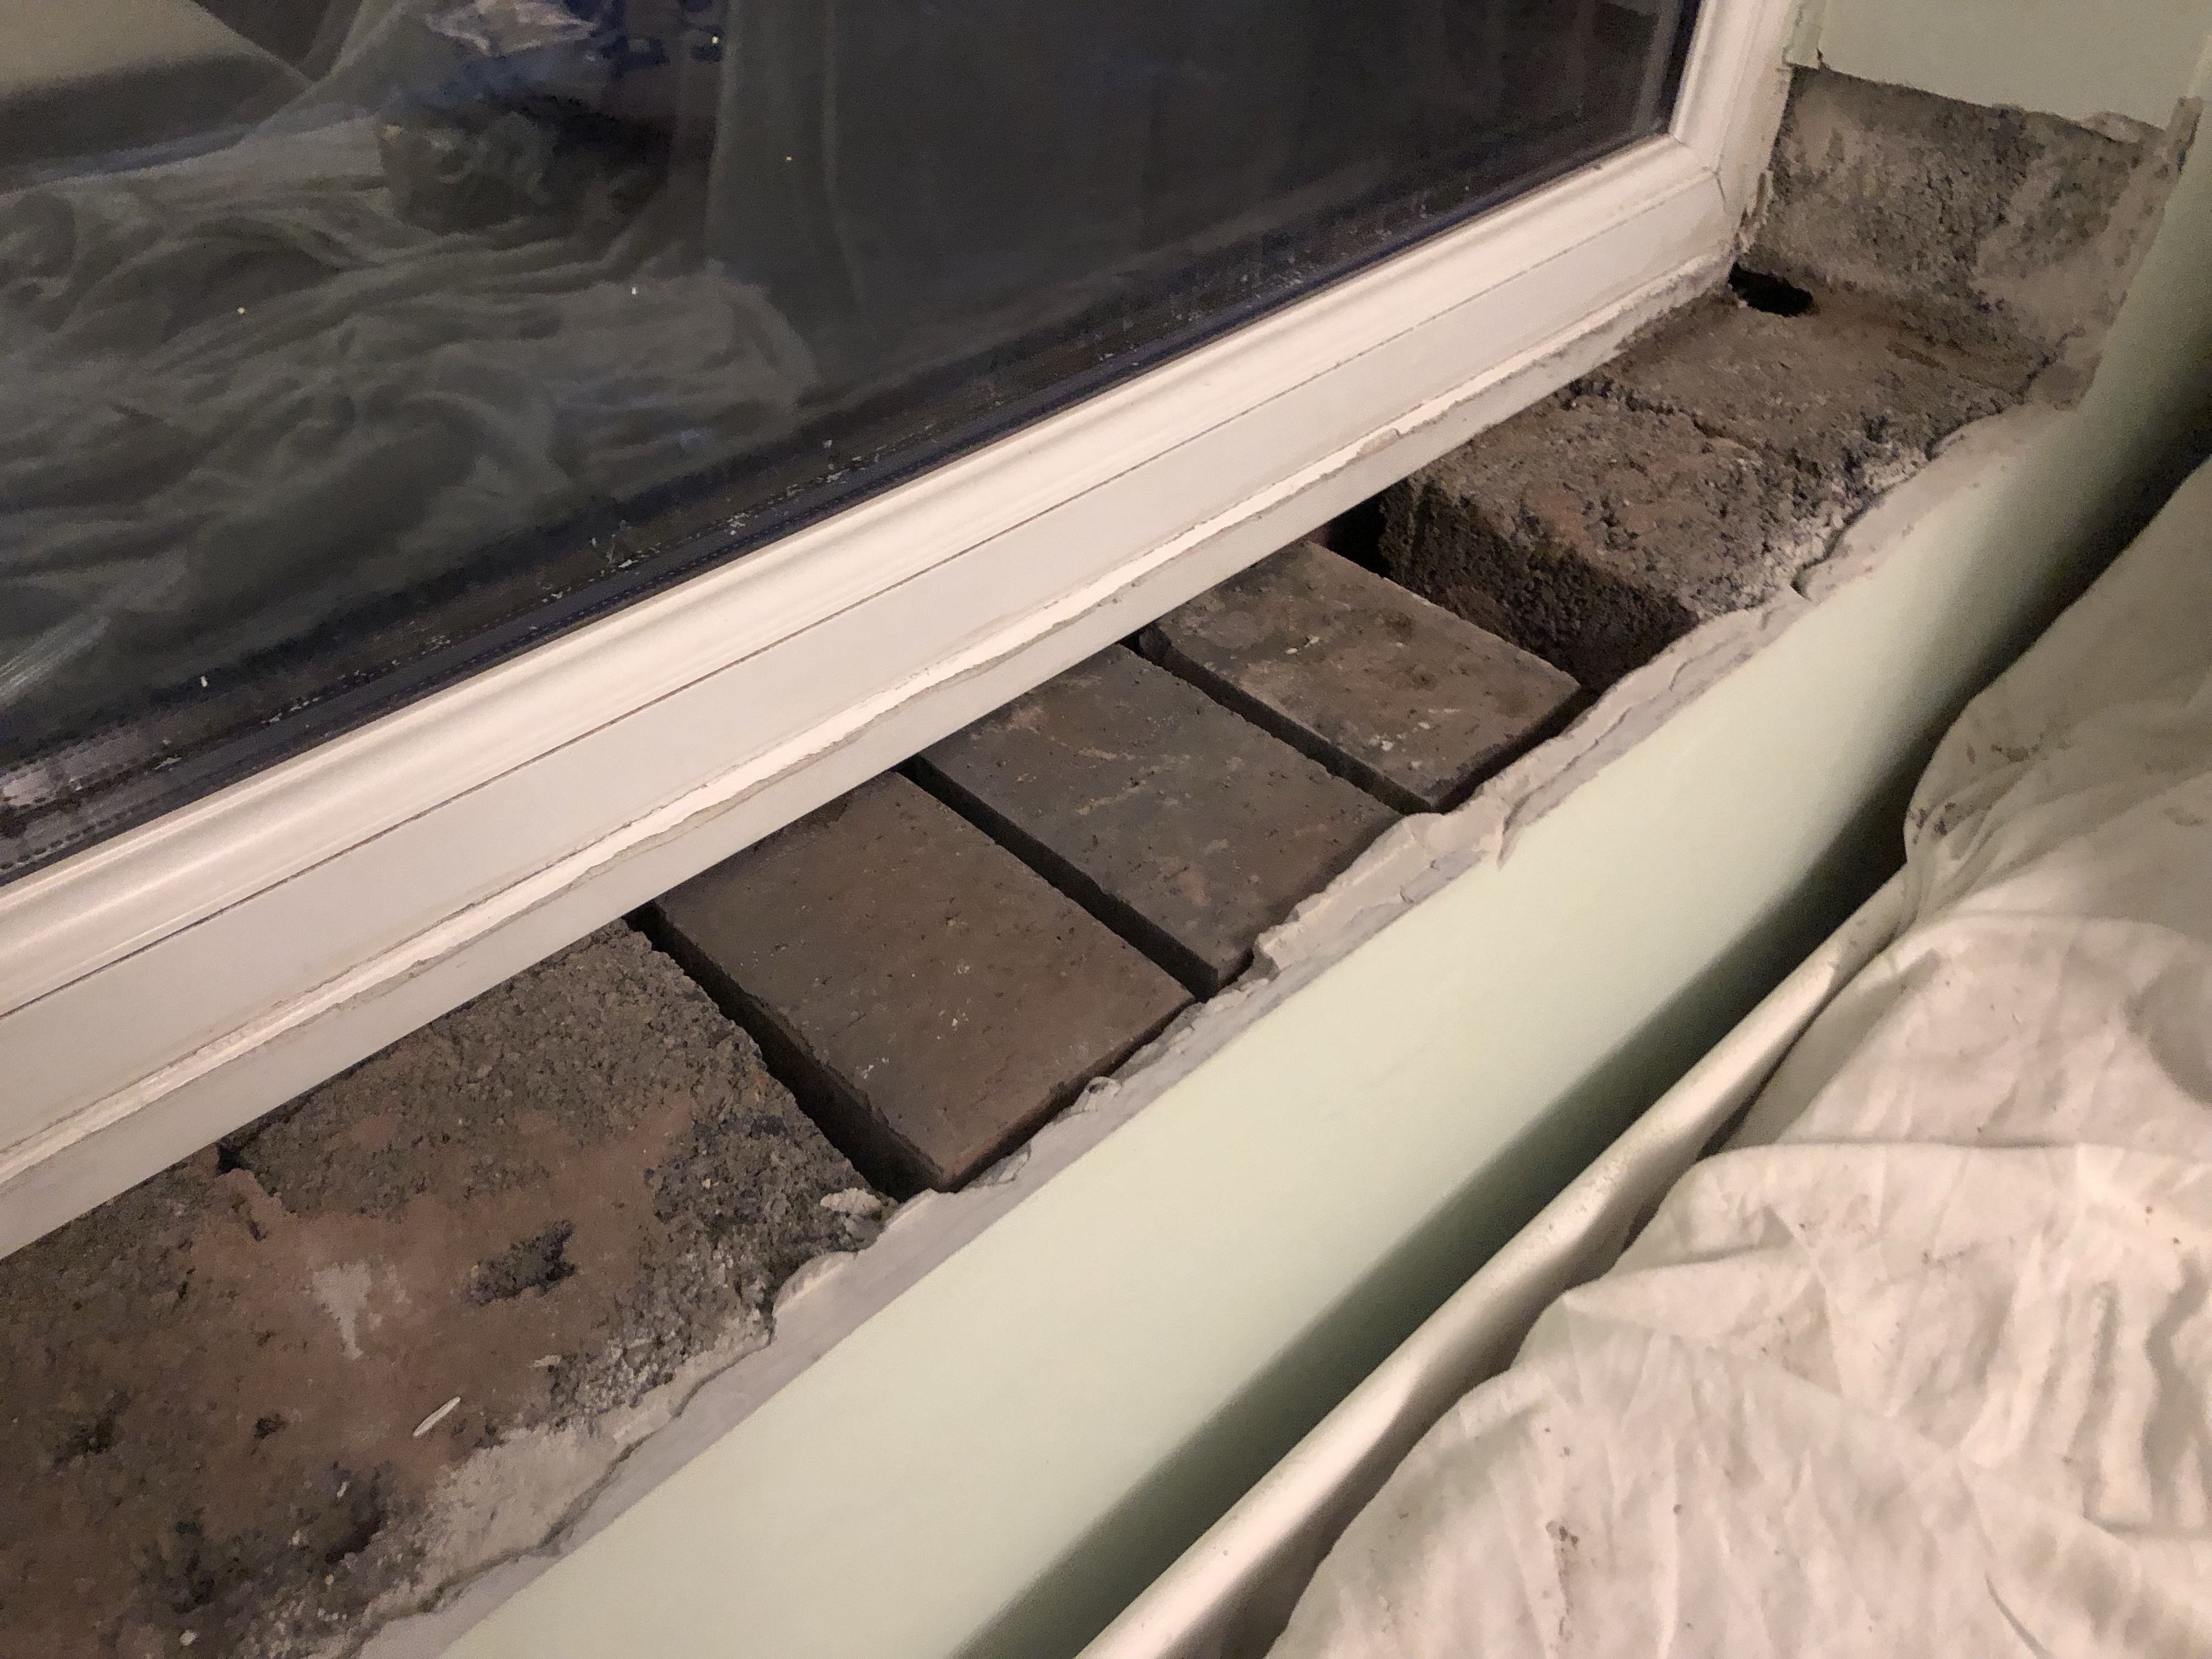
Spare bedroom: bricks missing
WTF is with this house? Bricks actually just missing, with a piece of wood thrown in for good measure…
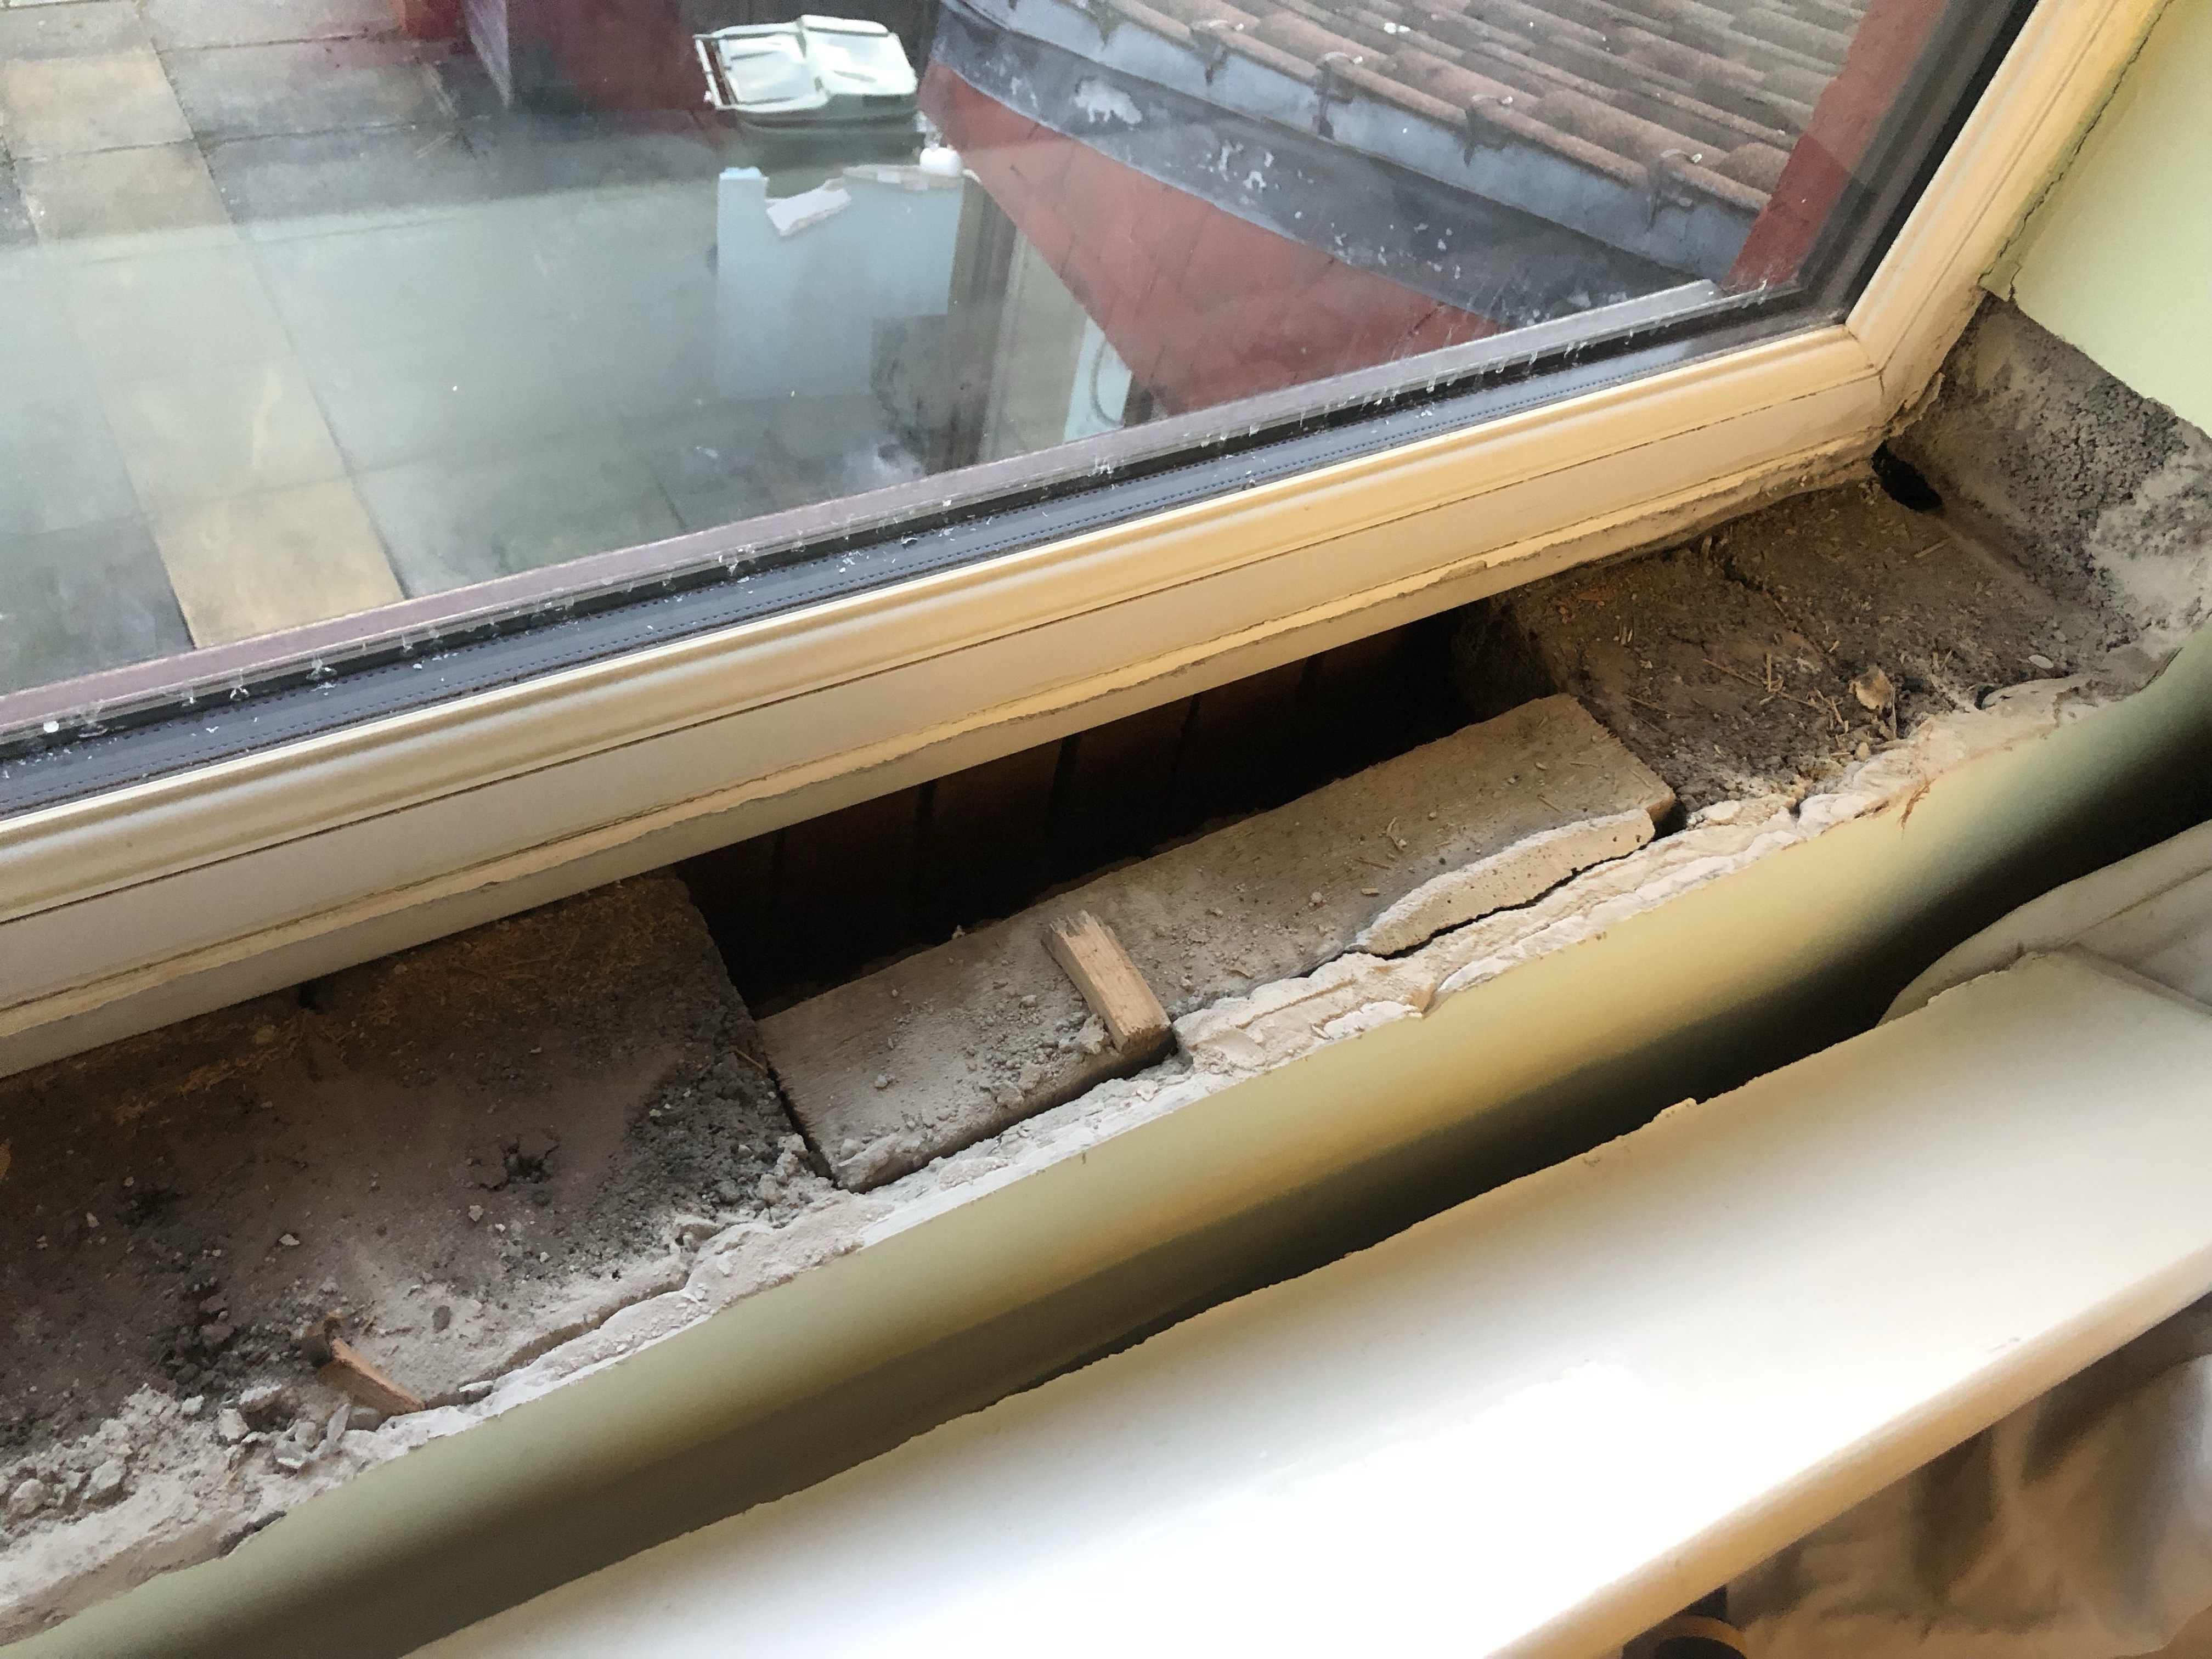
Repaired by adding 3½ bricks…
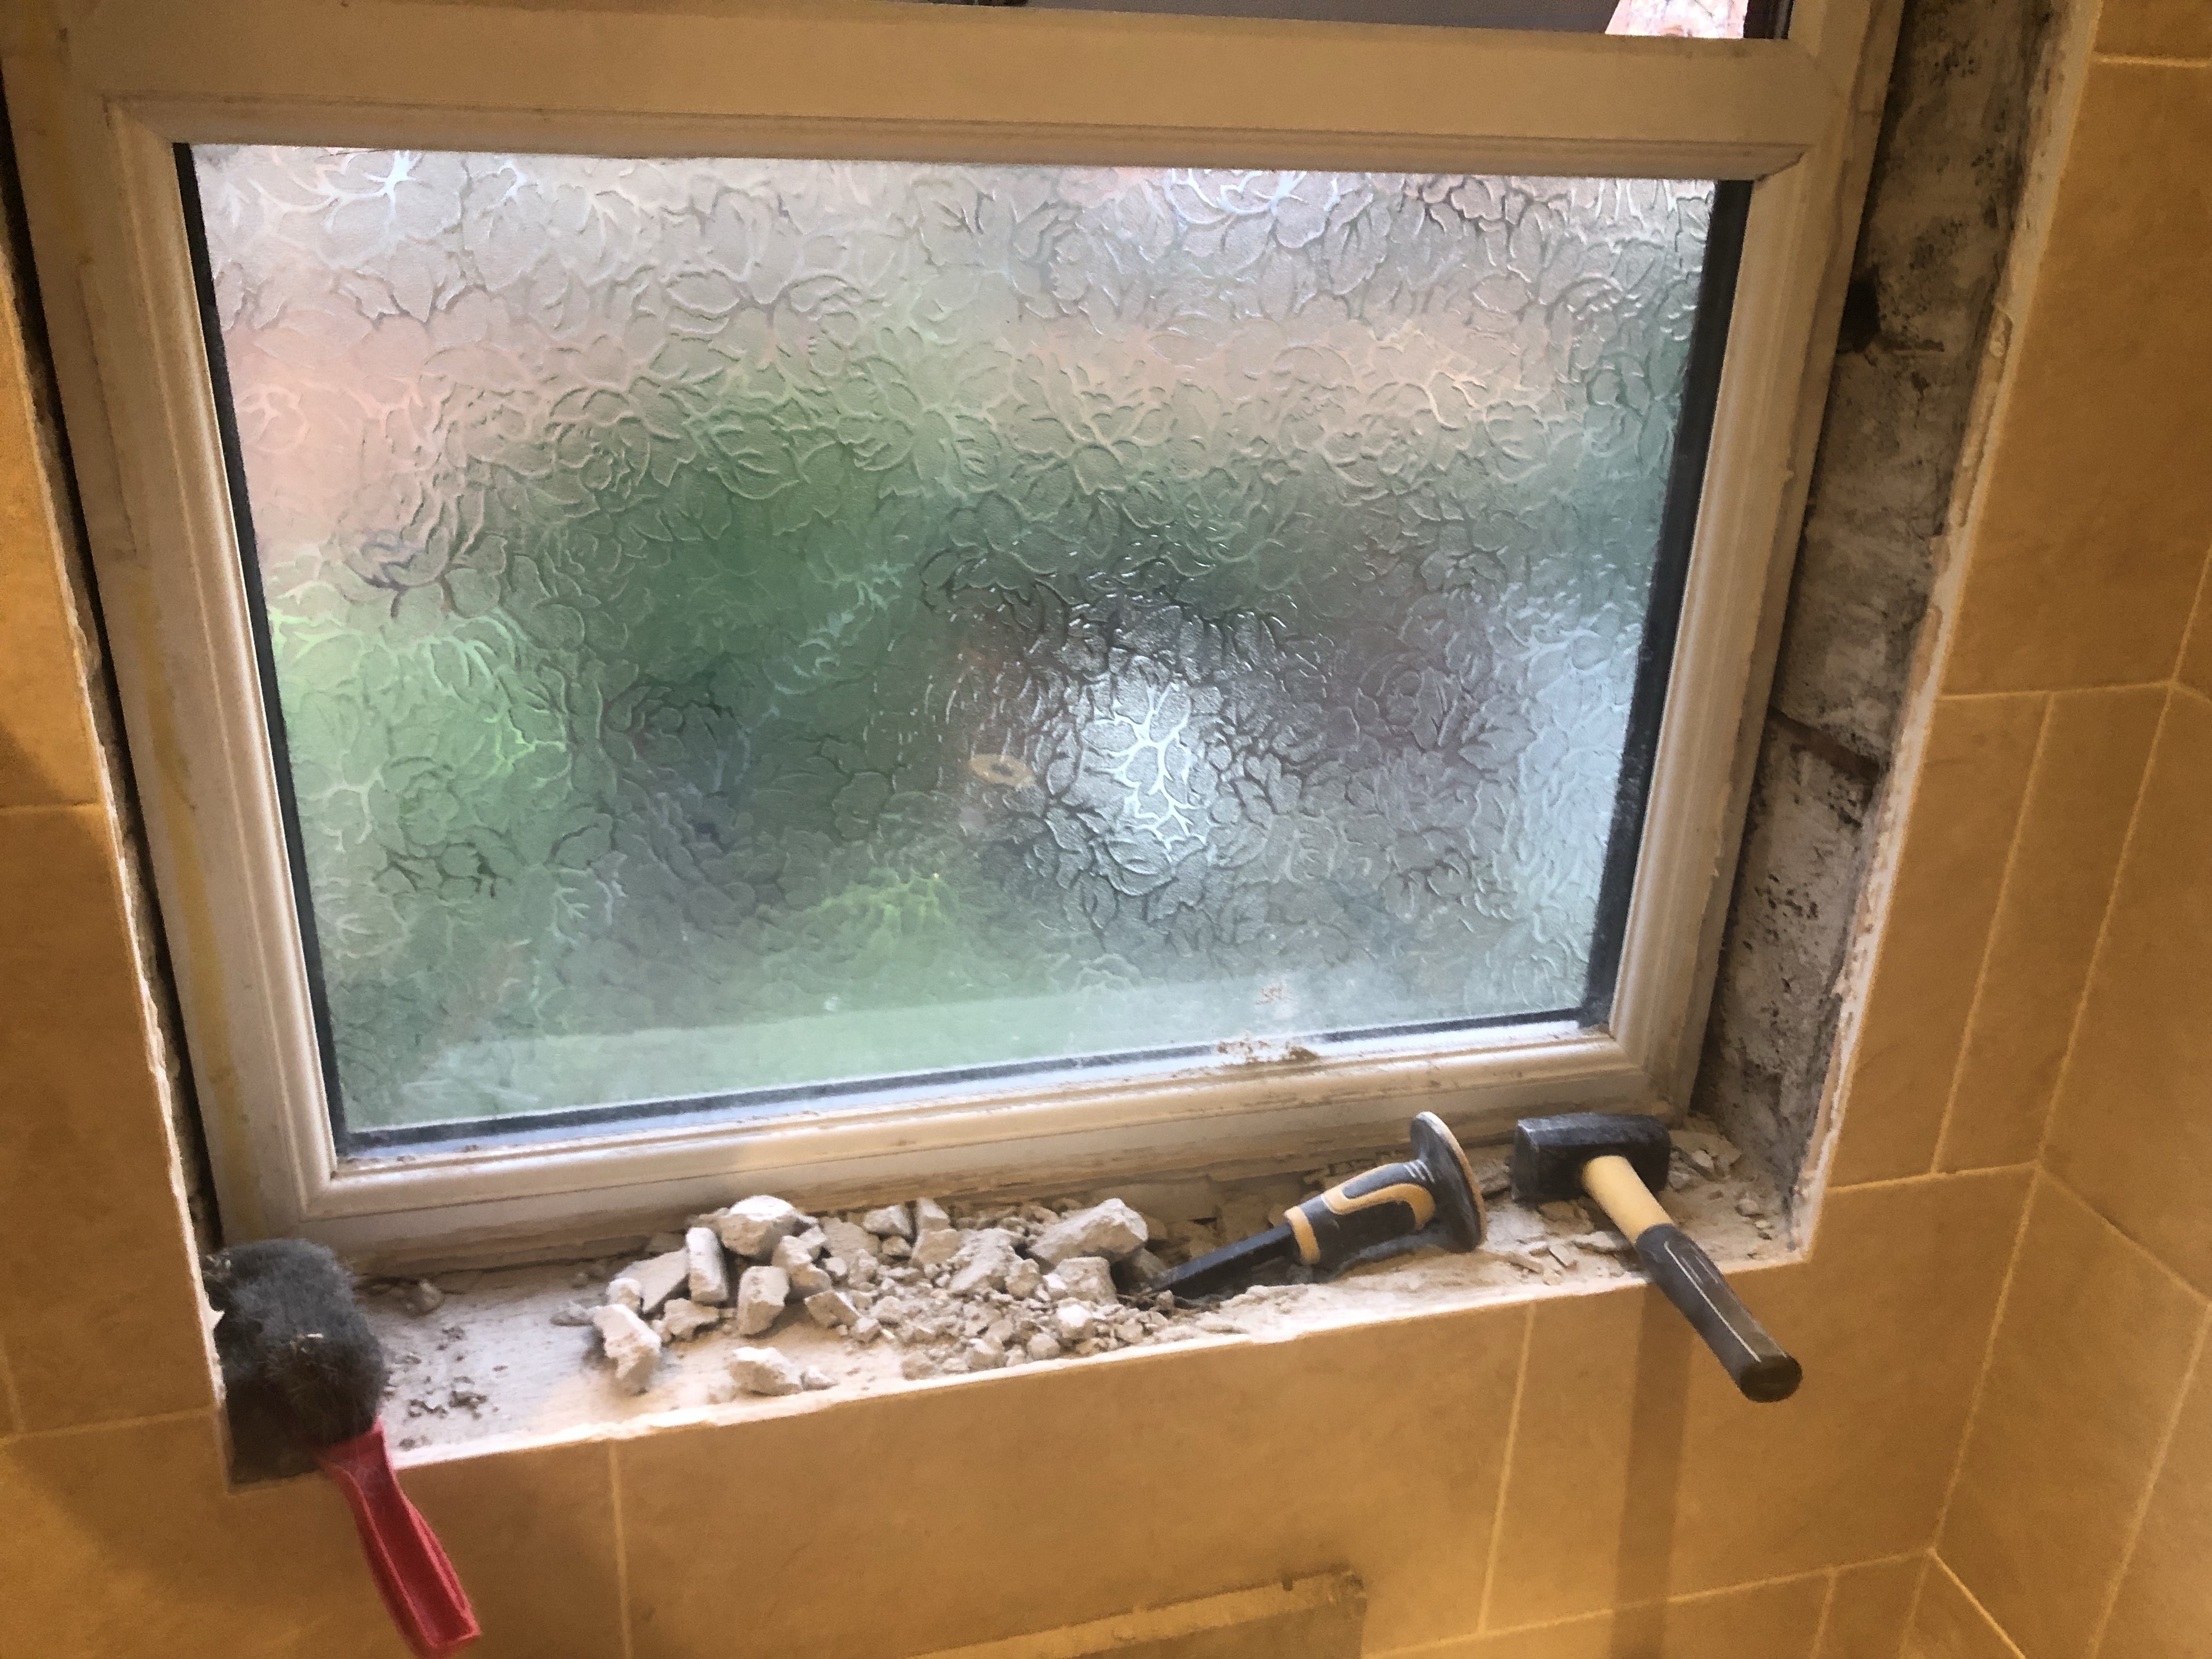
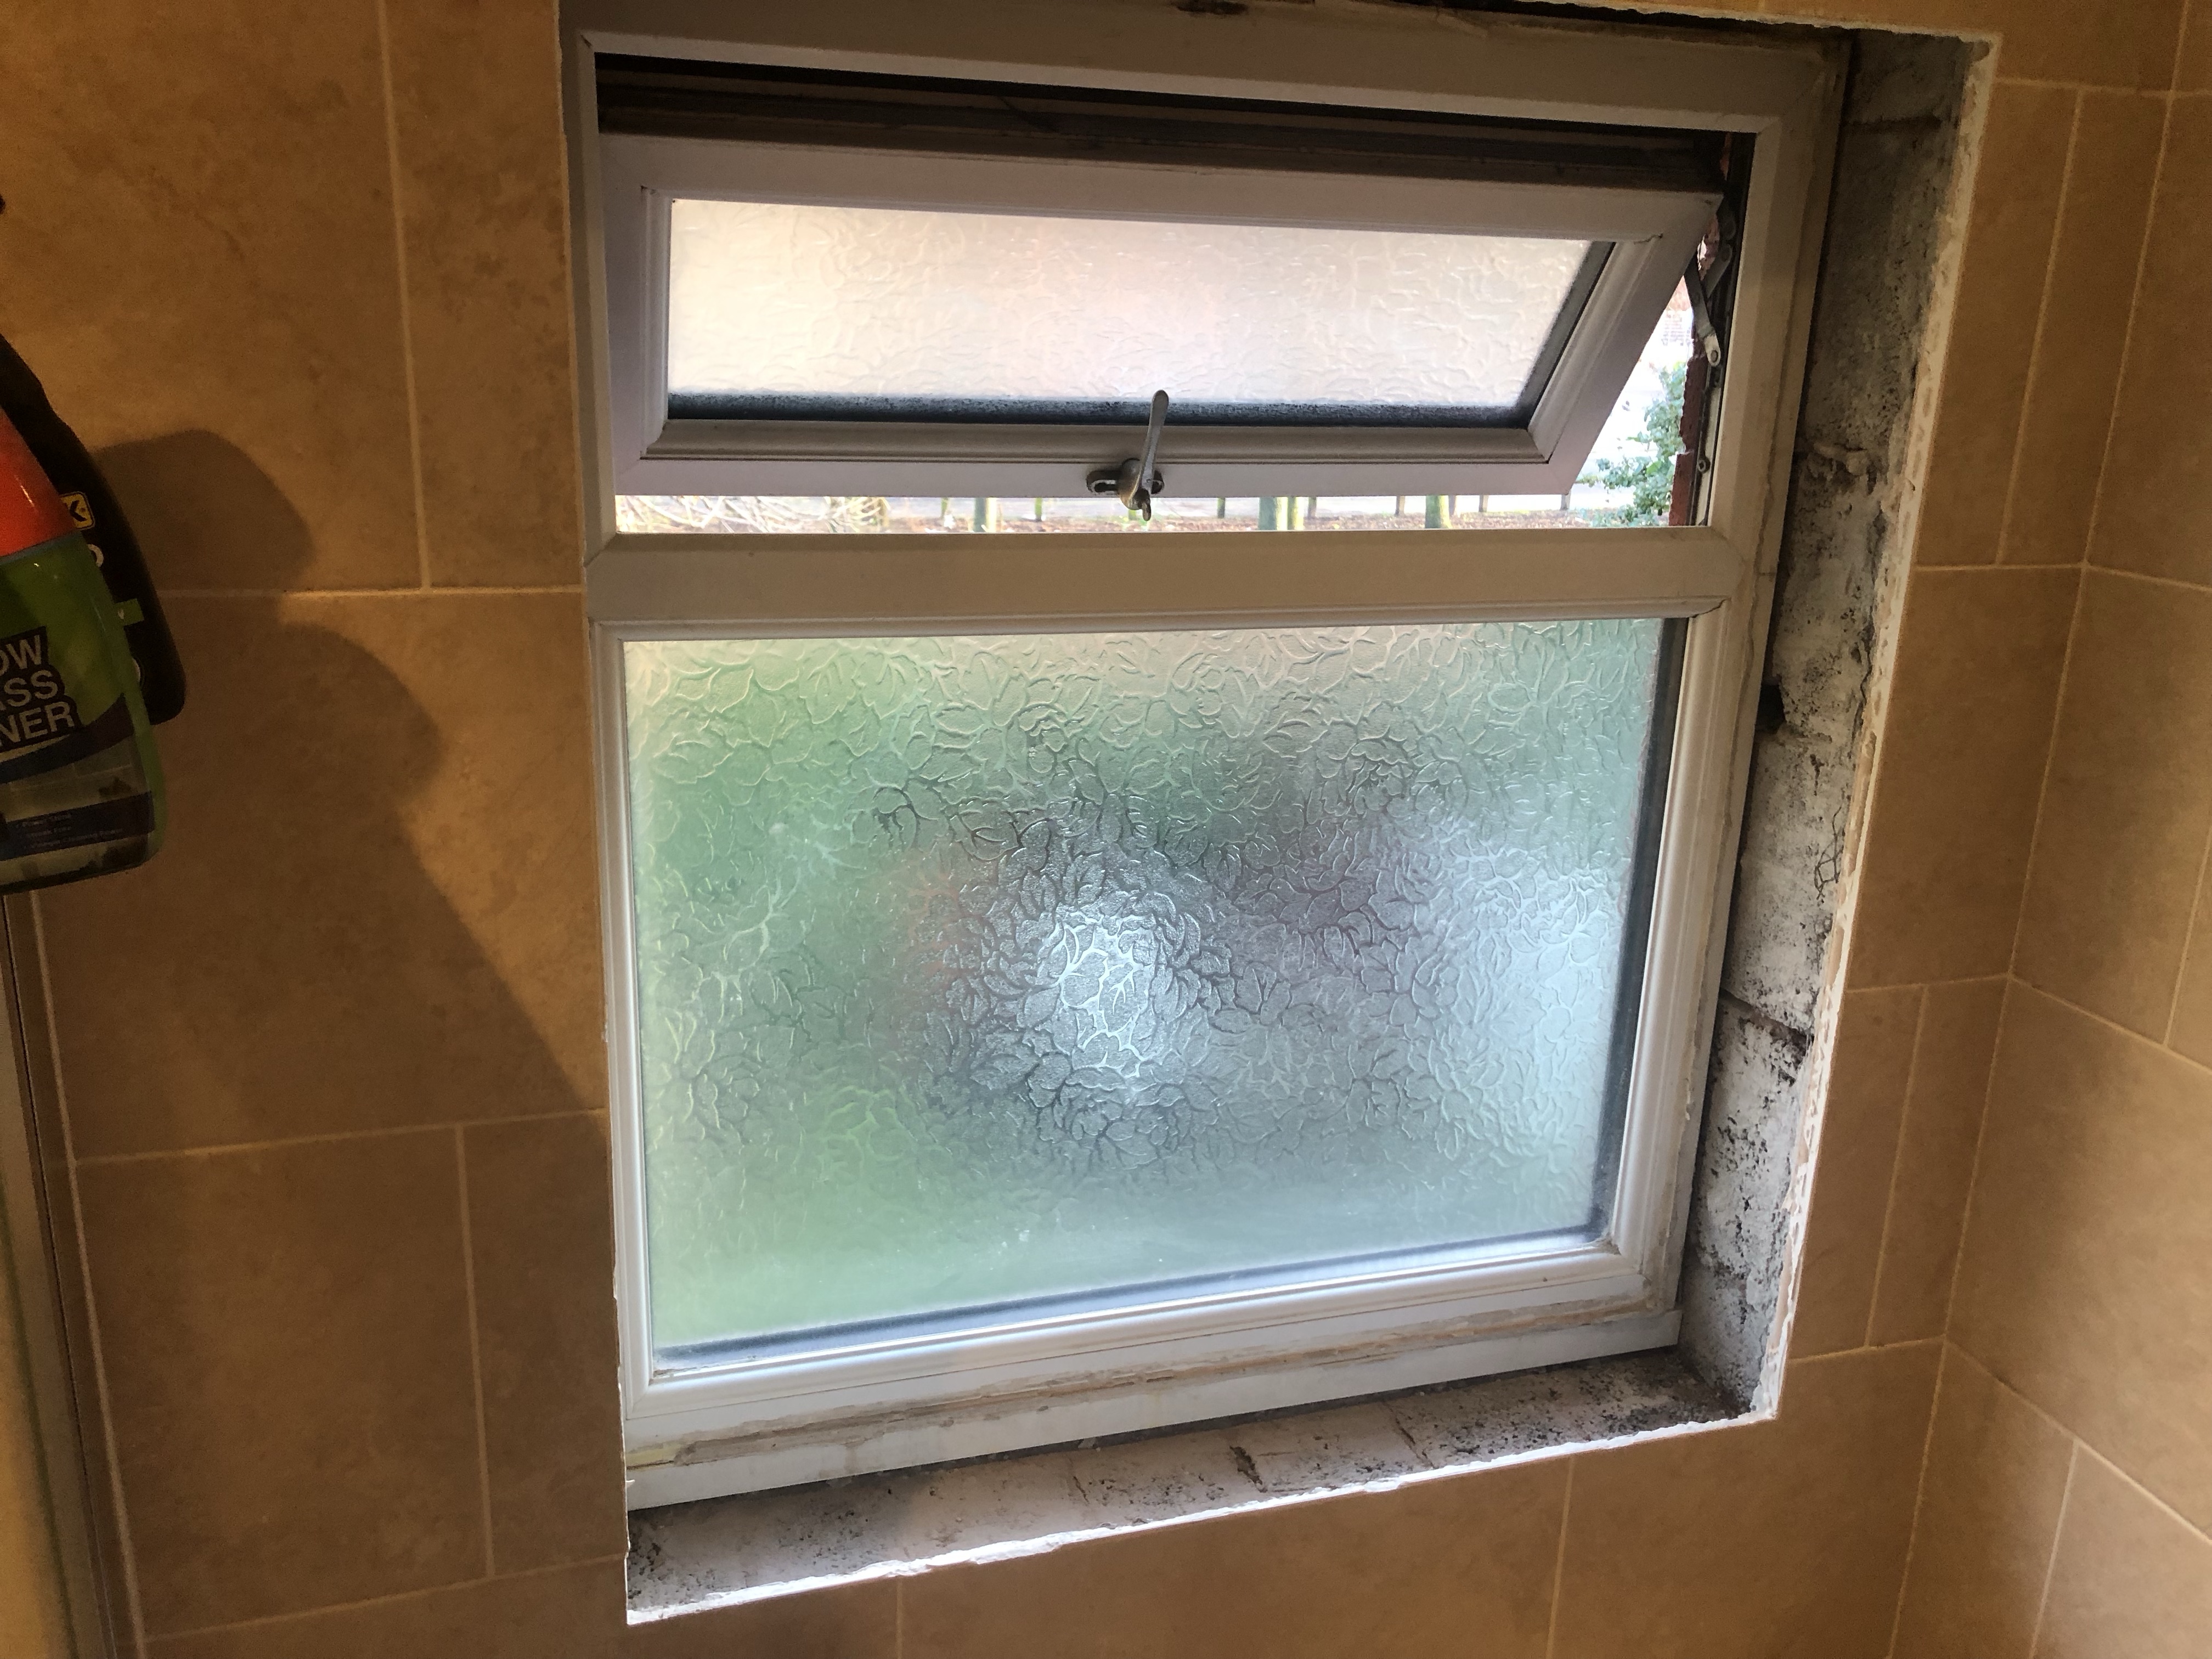
Bathroom
The bathroom was the most challenging. We wanted to take the reveals, cill and head back to brick but keep the wall tiles.
It took a lot of careful cutting of grout to isolate the wall tiles from the subsequent bashing of the plaster.
Turns out there were two layers of tiles then 20mm of plaster. That gives loads of depth for adding insulated plasterboard. Being the most humid room in the house, this was the worst for condensation and black mould.
I’m glad I bothered with this tricky window as the air-tight tape and insulation should massively improve the cold reveals and reduce condensation risk.
The only casualty was the sink. This happened at the end of an evening: the mallet slipped out of my tired and dusty hand, straight through the sink’s porcelain.
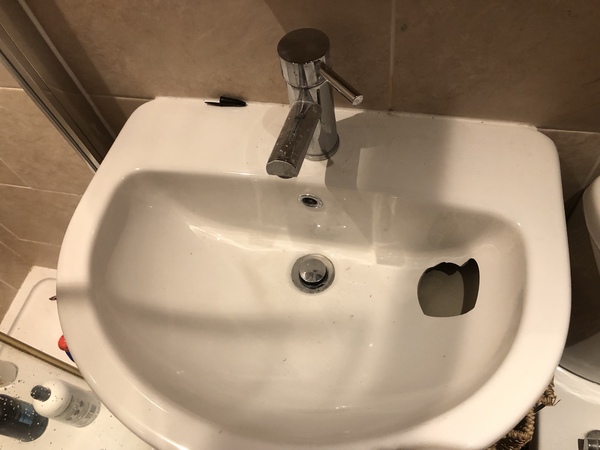
Then, as I cleared plaster out of the hole, I sliced my knuckle so deep I could see yukky white … insides. Ouch.
Was it worth it?
You might think we’re crazy for going to these lengths (at times during the demolition I did too.)
These new windows should last a lifetime. They’re not a throwaway item that gets ripped out every 10 years. They’re central to the fabric of our house, like the walls and roof. I don’t want to replace them again in my lifetime.
And even if we sold the house, I reckon we could find a buyer who values our retrofit work and will pay an appropriate premium.
With that frame of mind, absolutely it was worth it.
These windows should be the highest performing and most climate-friendly that we could have achieved.
That make me happy ☺️